
Find out how to create this elegant typography image with Photoshop! This tutorial will show you how to combine layer styles, Photoshop brushes, and stock photos to create this typography artwork.
Preview of the Final Result

Elegant Typography on Vista Background Photoshop Tutorial
IMPORTANT: Whenever you create an effect, use the action palette to store the functions so that it is easier for you to get the same effect when you need it again.Step 1 - Create a New Document
Choose File > New (Ctrl/Command + N). This wallpaper size is 1440px (width) X 900px (height). You can use any wallpaper size that you wish.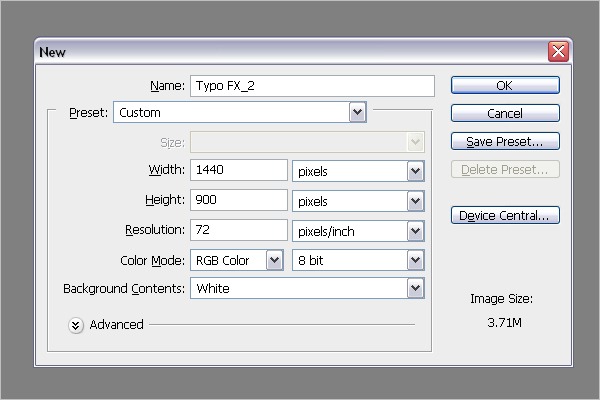
Step 2 - Background
Use a gradient background, which will help in the upcoming steps to see how the image changes with each step. Select the gradient tool. Click on the Edit Gradient option in the left top corner.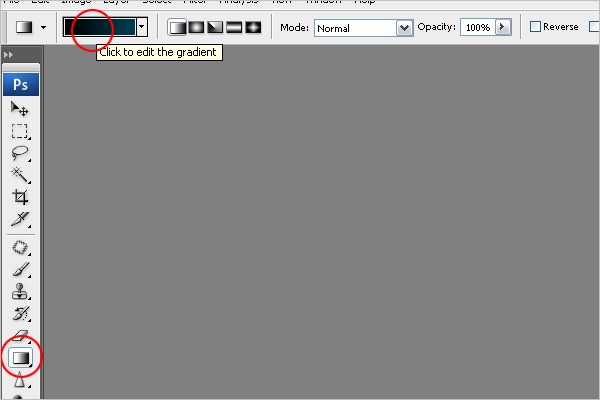
Step 3 - Changing the Color
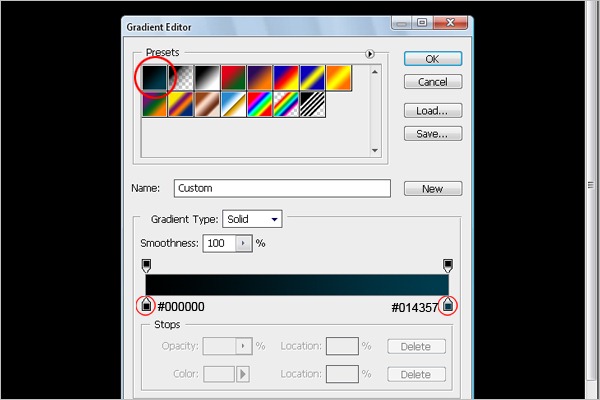
Usethe two color option. Select the left side color option and change it to black (#000000), then select the right side option and make it blue (#014357).
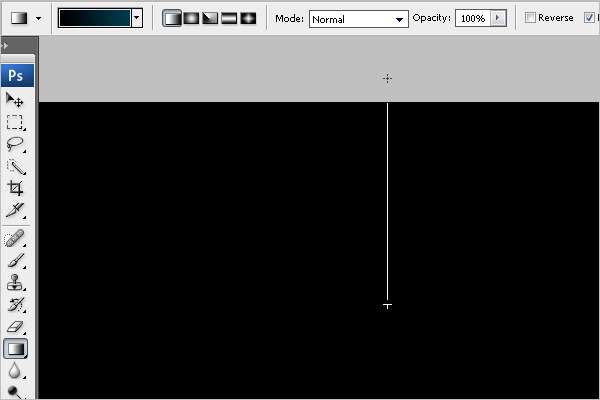
Again, use the gradient tool and drag it to the topside of the screen.

Step 4 - Creating the Text
Type the text "0”. Select the font Arial > Font size = 1119pt. > Color = #dedcdc. You can decide which font size works best for you
Step 5 - Adding Bevel and Emboss
Add bevel and emboss effects to give some depth to the text.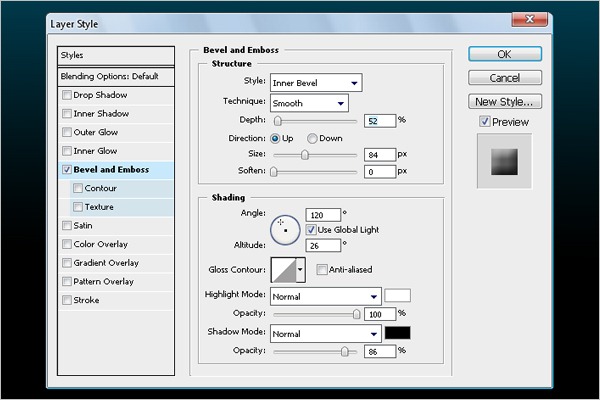

Step 6 – Download Floral Design
Add a floral design behind the text. This design gives a cool look to the text. You can get this design from this link:http://myphotoshopbrushes.com/brushes/id/244
Once you have downloaded it, load the brush and choose the 1037 brush from the palette.
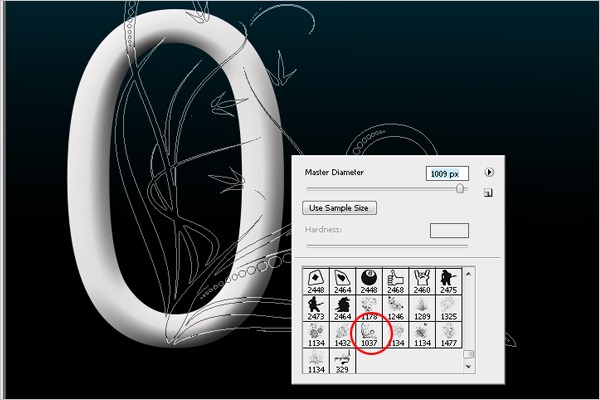
Step 7 - Adding Floral Design
Select create a new layer and choose the color gray (#808789). Click on the screen to place the design. Make sure that the design is placed behind the text.
Step 8 - Removing the Unwanted Design
Erase the design that is inside the text.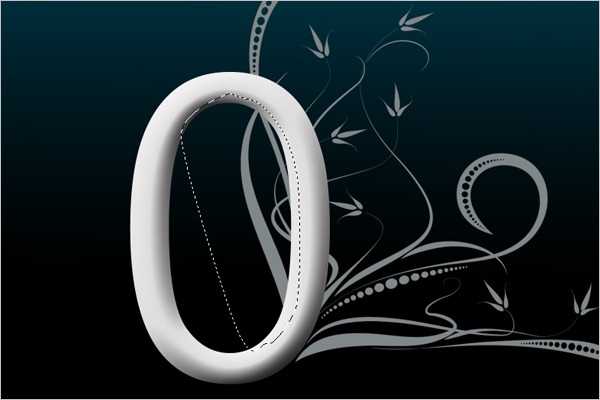

Step 9 - Adding Bevel and Emboss
Add bevel and emboss effects to give it a 3D feel.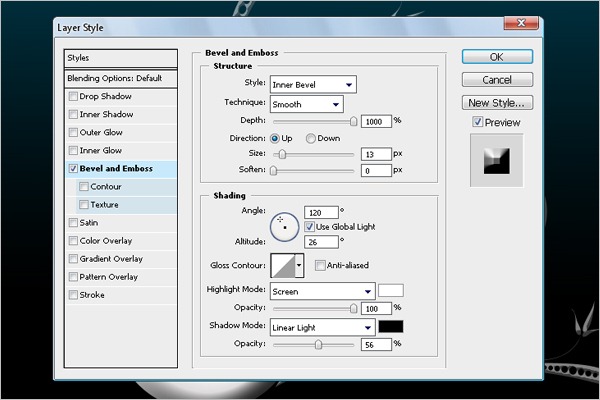

Step 10 - Adding Outer Glow
Add a glow effect to give a glossy feel to the design.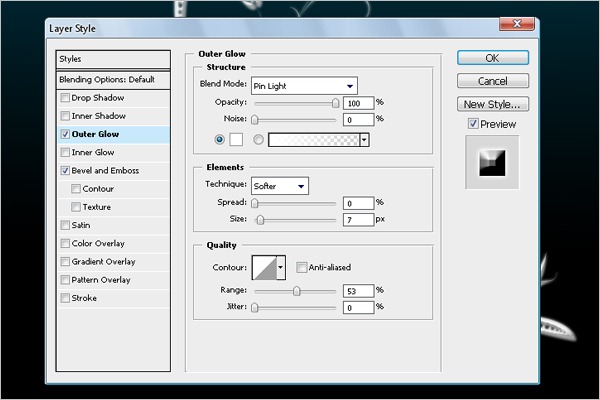
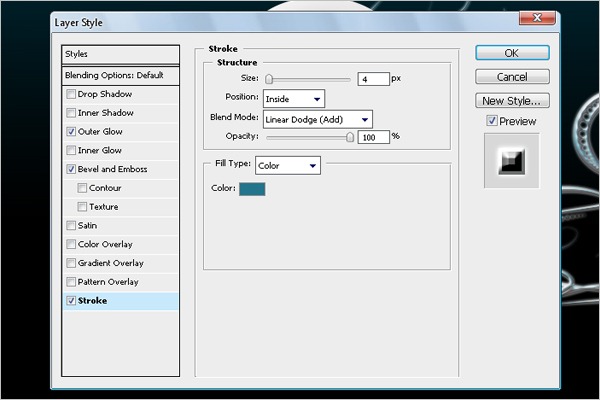
Step 11 - Adding Stroke
Add a stroke effect. This will help blend and finish off the edges of the design.Follow the settings below and select the stroke color as blue (#23758c).

Step 12 – Duplicating the Design
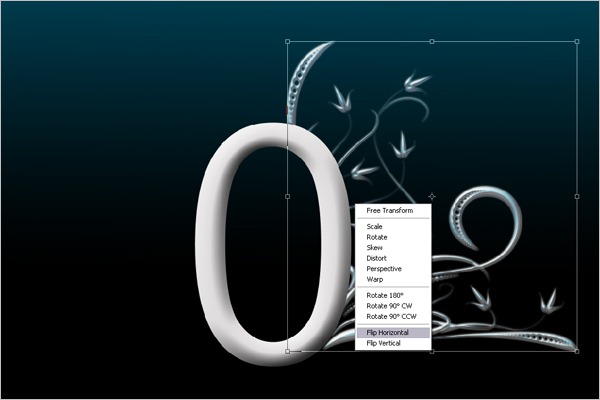
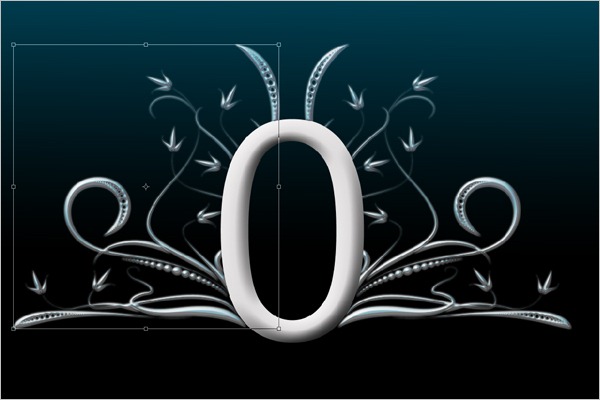
Add the design to the opposite side of the text. Duplicate the same design on the left side of the text.Click on the design layer and Press Ctrl + J to duplicate > Press Ctrl + T to transform > Right click on the screen and select Flip Horizontal > Once it’s flipped, move the design to the left side of the text as shown in the final image below.
Step 13 - Adding Glow Effect
Add a light effect to the design to make the flowers glow.Select brush tool (B) > Right click on the screen and choose soft round 45px brush > Make the brush diameter 70px
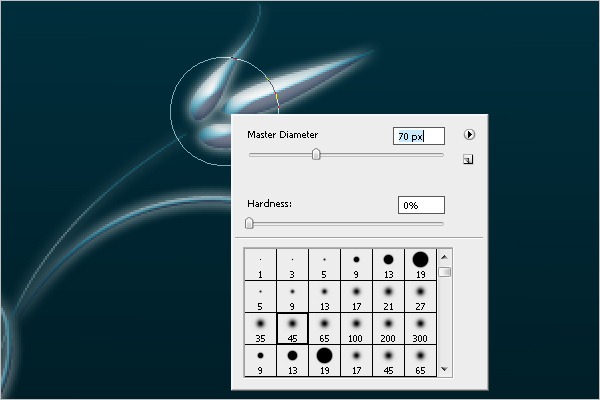
Step 14 - Adding Glow Effect
Once you select the brush, make sure that your foreground color is white. Create a new layer and click on the design.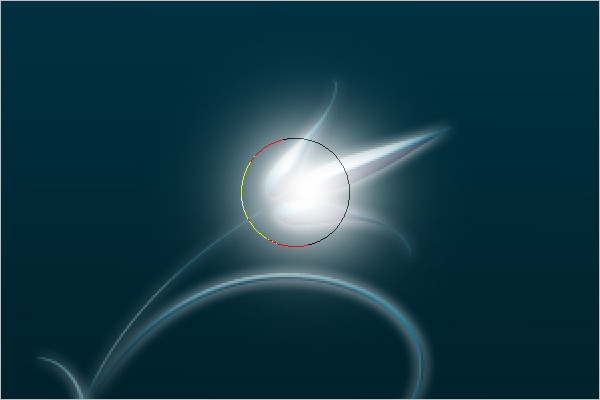
Step 15 - Blending Glow Effect
Blend the glow effect with the design to create a glowing feel. Select the brush layer and choose the blending mode as "Overlay".
Step 16 - Duplicating the Glow Effect
Add the glow effect to the entire flower design.
Final

Step 17 - Creating a Light Glossy Shade
Create a glossy shade above the design to give a glowing effect to the entire image.Create a new layer and move it to the top of all the other layers > Choose the brush shown below.
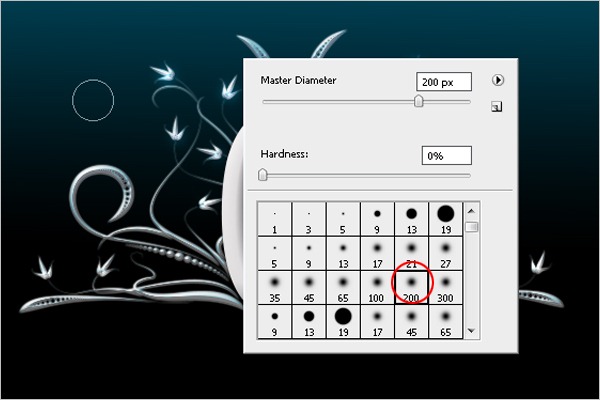
Step 18 - Creating a Path
Create a path using the pen tool (P).
Step 19 - Selecting a Stroke Path
Right click on the screen and select a stroke path.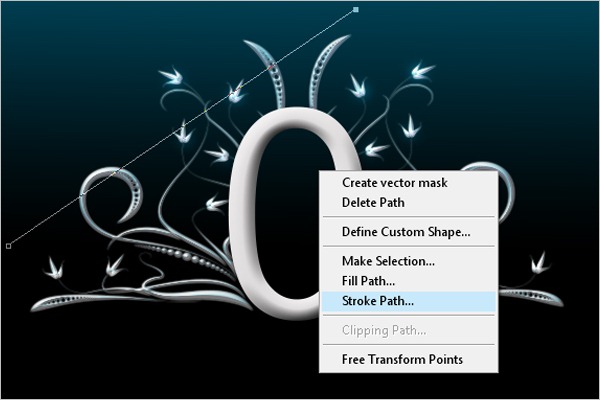
Step 20 - Filling the Stroke Path
Once you select the stroke path, you will get a stroke path option. Select Brush from the option and click OK.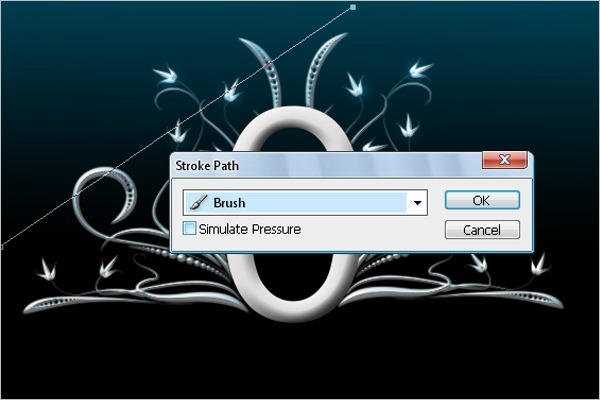
Final

Step 21 - Duplicating the Stroke Path
Once you are done with the stroke path, duplicate the path into multiple copies. Select the stroke layer > Press Alt + Click and drag in the same direction multiple times.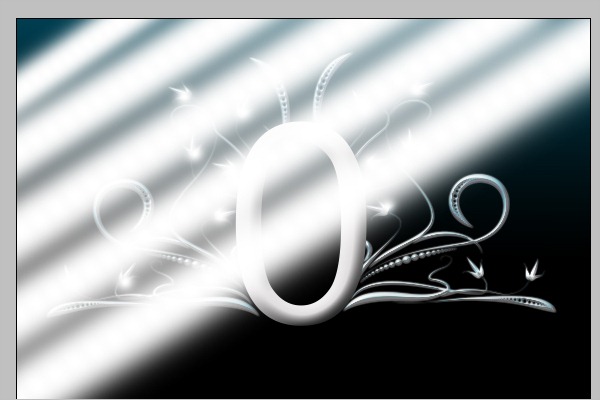
Step 22 - Blending the Stroke Fill
Transform the stroke fill to the entire screen. Select the blending mode from the layer palette as "soft light".
Step 23 - Adding Gaussian Blur
Make the stroke fill a little bit smoother. Select Menu > Filter > Blur > Gaussian Blur > Follow the settings below.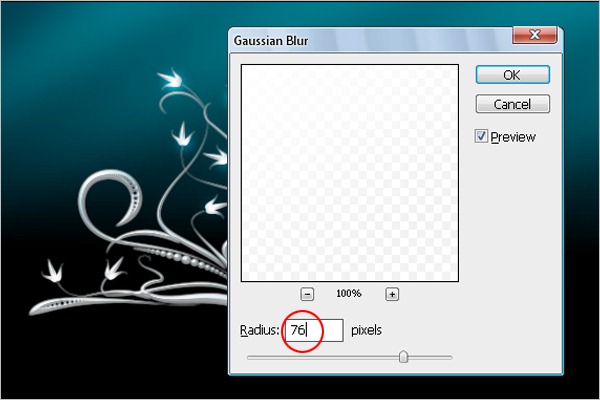
Step 24 - Adding Landscape
Add a landscape to the typo design. You can download the image here:Once you download the image, insert it on the screen and press Ctrl + T to make it transform. Make sure that this image layer is at the bottom of all the other layers.
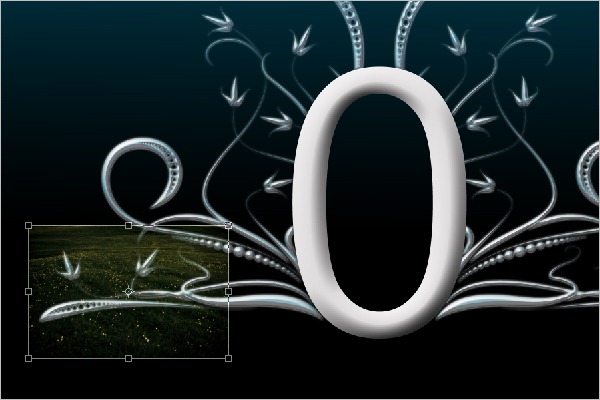
Step 25 - Transforming the Image
Select the transform tool, then click and drag it to the entire screen as shown below.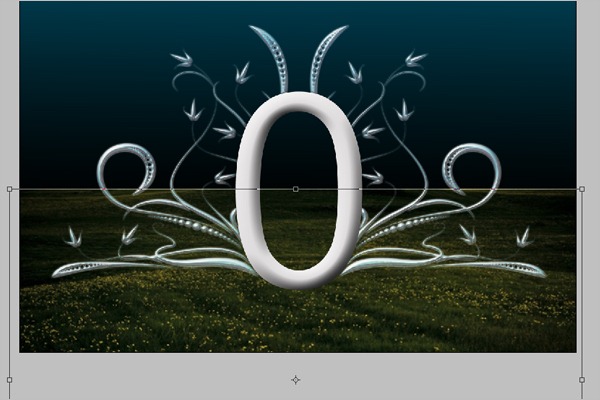
Step 26 - Adding Levels
Do some color setting to the image to add levels. Press Ctrl + L and follow the settings below.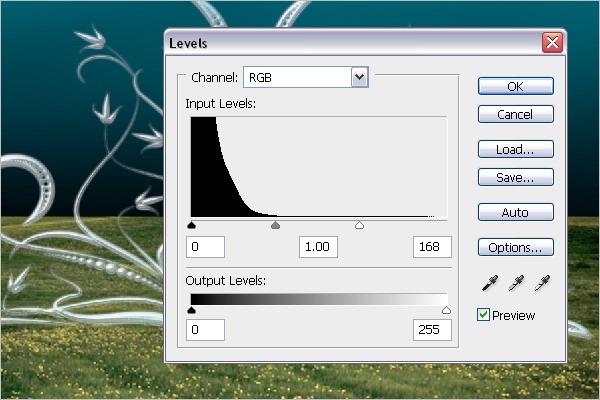
Step 27 - Creating Curves
Make the image dark enough so that when we add light, it gives off more of a glowing effect.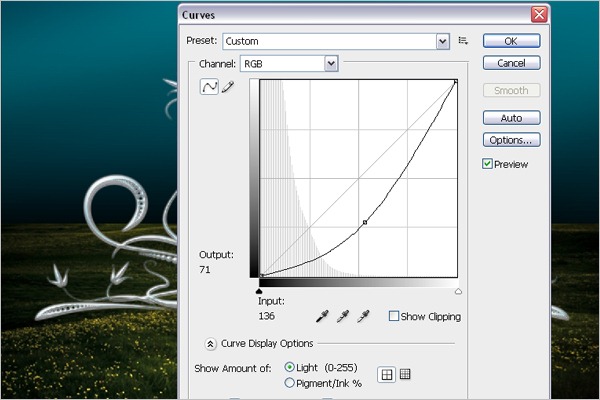
Step 28 - Adding Levels
Add levels to the image to make it a little bit lighter.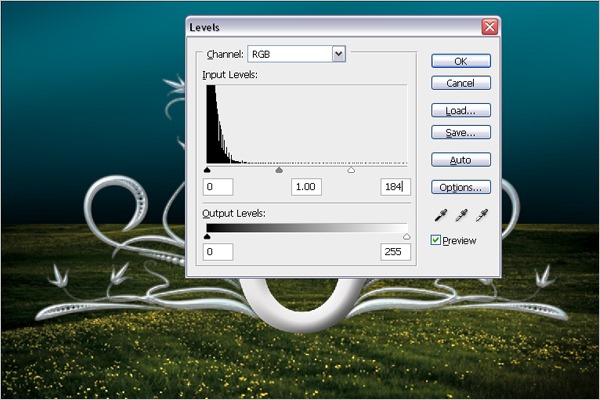
Step 29 - Creating a Path
Create a glowing reflection effect by creating a path. Select the pen tool (P) as shown below.
Step 30 - Filling the Path
Fill the path. Press Ctrl + Enter > Choose the foreground color as white > Press Ctrl + Backspace.
Step 31 - Adding Blur
Make the shape a little bit smoother by adding a glow effect. Select Menu > Filter > Blur > Gaussian Blur > Follow the settings below.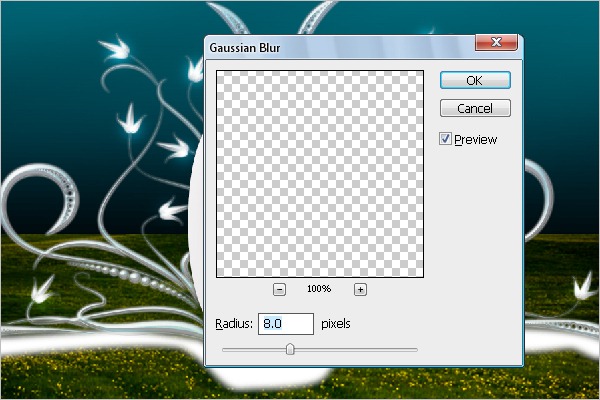
Step 32 - Creating Outer Glow
Add a glow effect to give a glossy feel to the shape. Set the outer glow settings as shown below. Go to Layer Blending mode > Choose Overlay.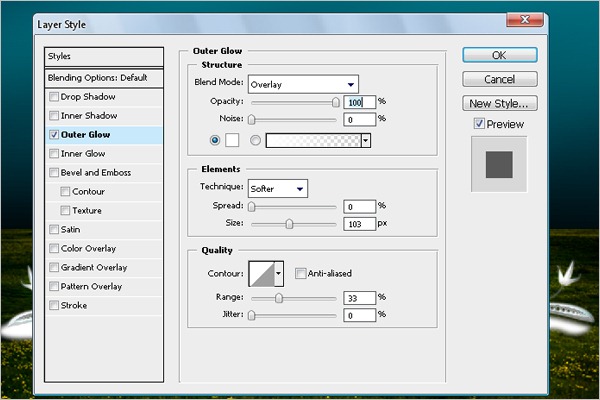

Step 33 - Adding Levels
Add a little bit of level to make the glow stand out more.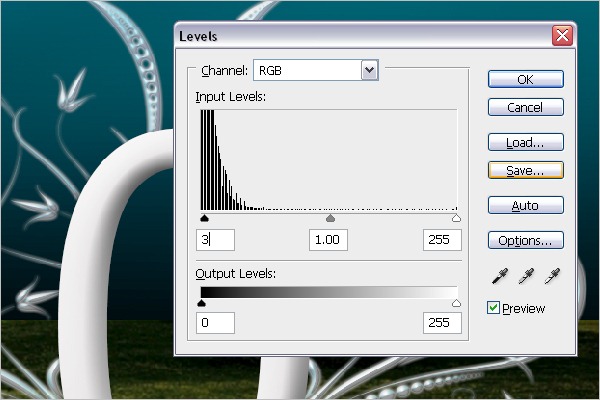
Step 34 - Adding Shadow
Add a cool shadow to the text. Select the Ellipse Tool (U) from Tools and create a shape path as shown below. Next, fill it in with black color.

Step 35 - Adding Gaussian Blur
Make the shape smooth so that it flows to all the areas around the text.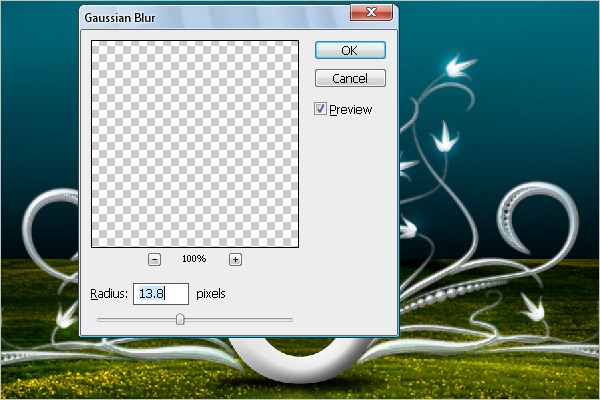

Step 36 - Adding Grass
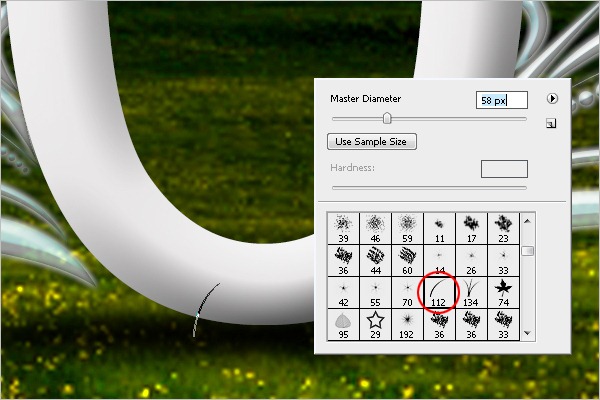
Add some grass above the text to get the feeling that the text is placed on land.Select the Brush Tool (B) > Right click on the screen and select Dune Grass. Once you’re done with the settings, click on the shadowed area to place the grass.

Step 37 - Adding Clouds
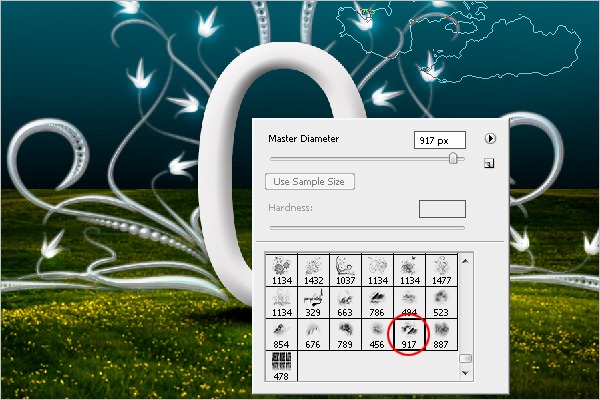
Create clouds to get a real landscape feel. Download the brush from this link: http://getbrushes.com/weather-photoshop-brushes/javierzhx-cloud-brushes.phpLoad the brush and select the 917 cloud brush. Create a new layer and place the brush on the image. Make the brush big enough so that it covers half the screen. Duplicate the cloud you just created and place it on the other side, or make a new cloud brush and place it as you wish.
Step 38 - Adding Motion Effect
Add a motion effect to the clouds. Select Menu > Filter > Blur > Motion Blur > Follow the settings below.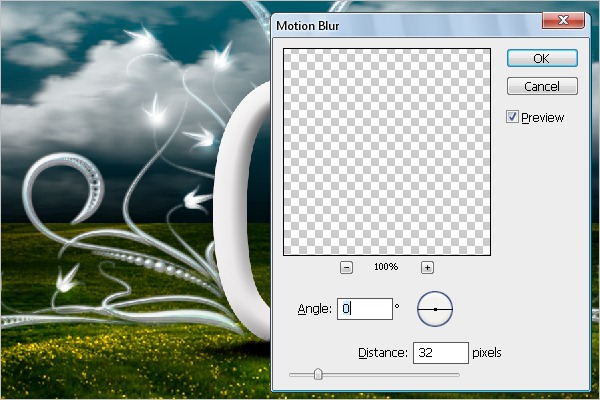
Step 39 - Adjustment of Clouds
Adjust the clouds according to the space. Fill in the blank areas with clouds.

Step 40 - Creating a Path
Create a path for the particles to flow along it. Select the pen tool (P) > Create a path like the one below.
Step 41 - Adding Particles
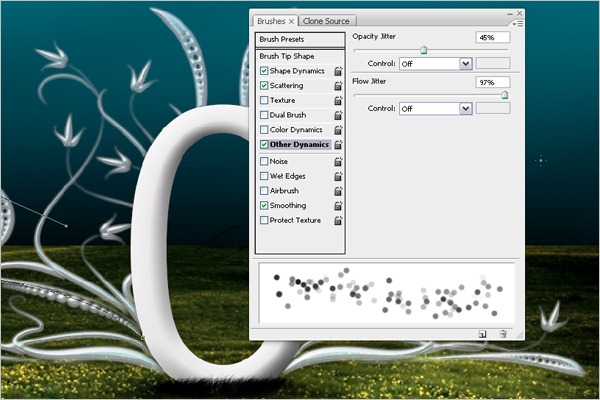
Select the brush settings before filling it with the particles. Select Menu > Window > Brushes Palette > Follow the settings below.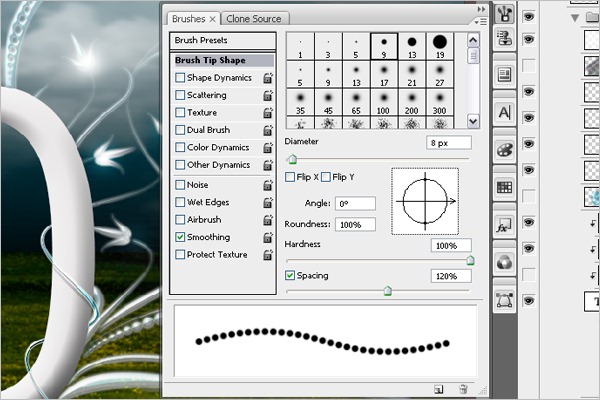
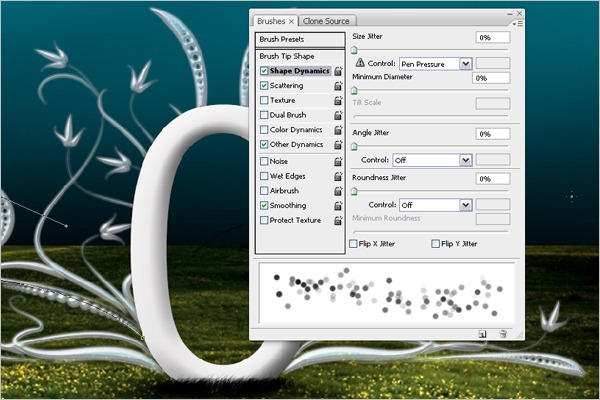
Shape Dynamics
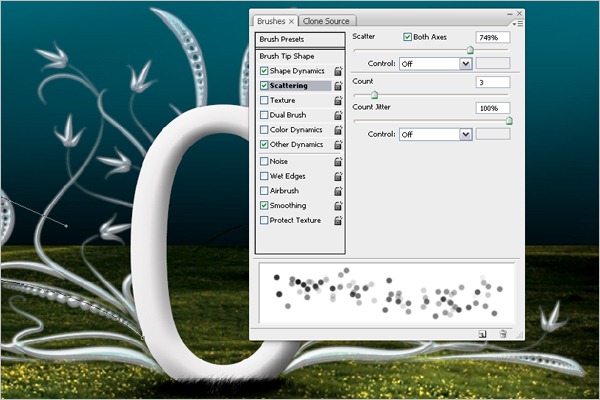
Scattering
Step 42 - Filling Particles
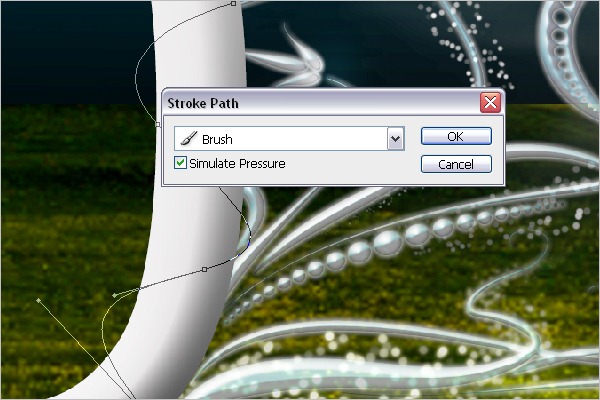
Once you are done with the settings, select the pen tool (P) > Right click on the screen and select Stroke Path > Select brush and activate "Simulate Pressure" to give smooth edges.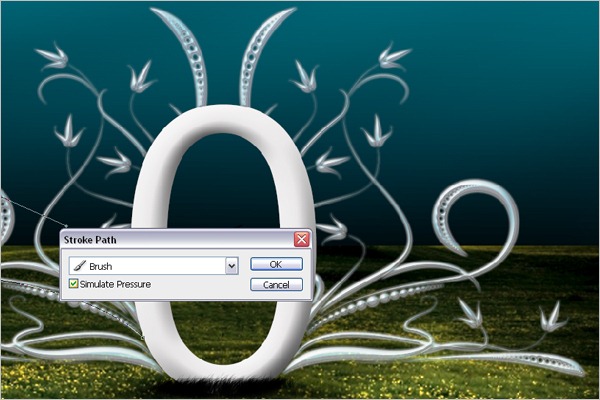

Step 43 - Multiplying the Particles
Follow the same instructions in Step 42 to create the particles for the entire design.
Step 44 - Finishing Touches
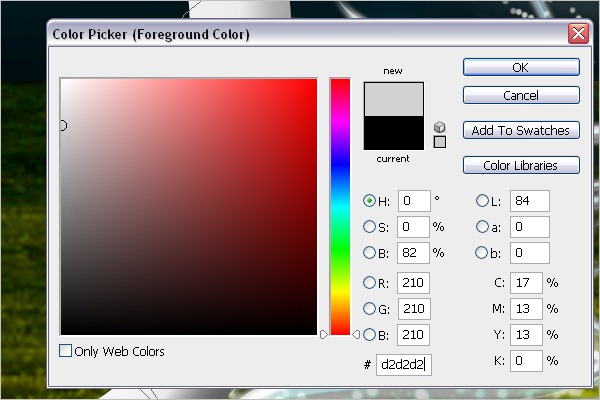
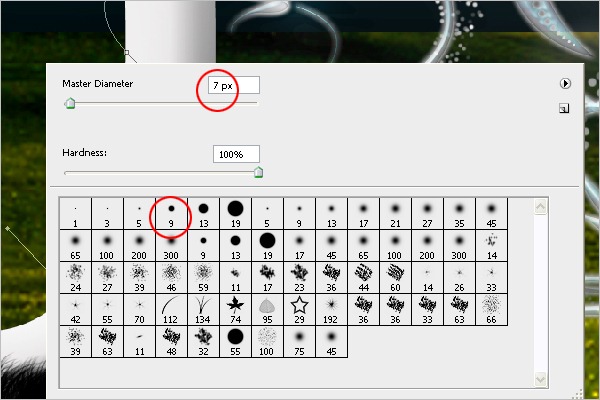
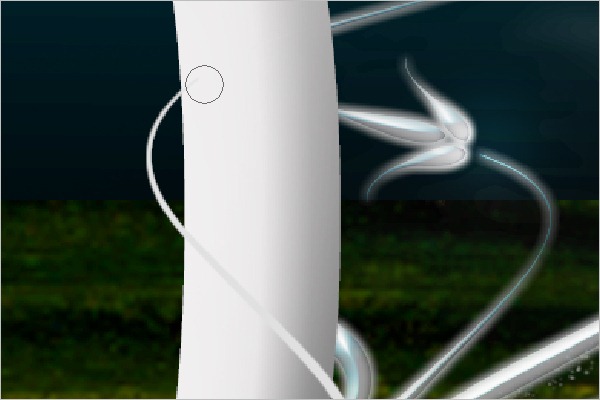
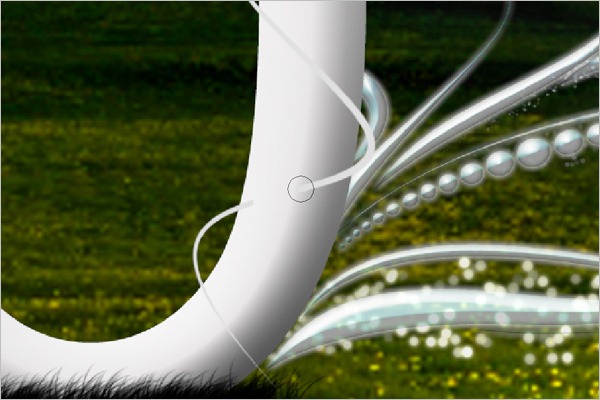
Select the pen tool (P) > Create a curve path as shown below > Select the foreground as a gray color (#d2d2d2) > Select the brush (B) > Right click on the screen > Choose hard round brush 9px > Brush size = 7px or 8px > Choose pen tool (P) > Right click on the screen > Choose Stroke Path > Select brush and activate "Simulate Pressure" to give smooth edges.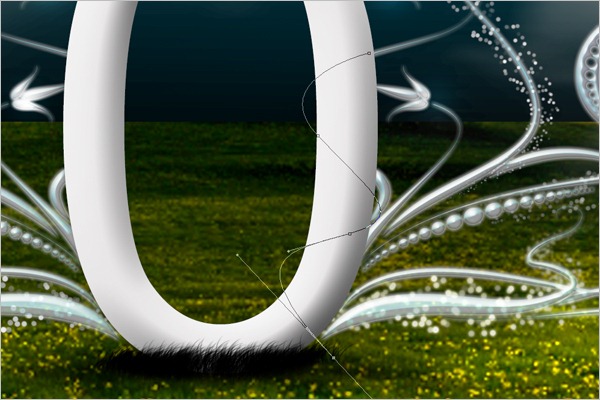
Step 45 - Erasing the Curve
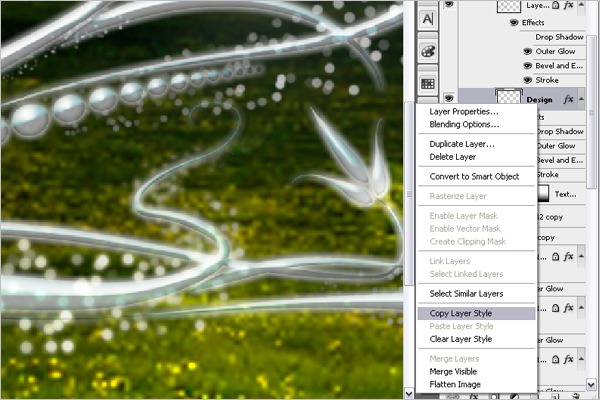
Erase the curve to create a 2D view. Choose the Eraser tool (E) > Right click on the screen > Choose hard round brush 9px. Start erasing the topand bottom shapes. Next, create the same effect that you did to the floral design. Select the floral design layer > Right click the layer > Choose copy layer style. Now Select the current curve layer > Right click the layer > Choose past layer style. Once you select the layer and duplicate it, flip it to left side of the text.

Step 46 - Add Shadow to the Curve
Finally, add shadow to the curve. Select the curve layer and duplicate both the layers > Remove the layer style > Fill the shape with gray > Bring the layer 3px down. Your shadow is ready. Your final image will look like this:![Final-Design[7] Final-Design[7]](http://photoshoptutorials.ws/images/stories/ElegantTypographyonVistaBackground_1102E/FinalDesign7.jpg)
Final Results
![Final-Design[7] Final-Design[7]](http://photoshoptutorials.ws/images/stories/ElegantTypographyonVistaBackground_1102E/FinalDesign7.jpg)

Other Dynamics

Tidak ada komentar:
Posting Komentar