
In this tutorial I will show you how to create a mystery photo manipulation using Photoshop brushes, different blend modes, and more. Let’s get started!
Final Image Preview

For the beginning create a new file (File>New) having 1920×1200px/72ppi. Then take the Paint Bucket Tool (G) and fill the new background layer with the next demonstrated color.

Select the Brush Tool (B) set the Opacity to 20% in Options Bar

Let’s put some brushstrokes on a new layer, the same way demonstrated below:
… and more on a new layer again…
Set for this layer Blend Mode to Color Dodge:

That’s the result you should get:

Find a stock photo with a model represented on it, I used this photo from deviantart. I would like to thank the author of this photo:
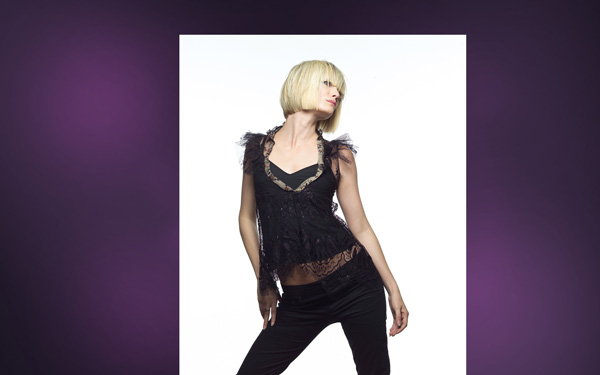
Remove the background using your favorite tools like Pen Tool (P), Magic Wand Tool (W), Magnetic Lasso (L) or even a simple Filter>Extract.

Create a new layer and insert here several dots with the brush, changing their sizes with the button [ or ]. The color’s code in this case is #BA93B3

… and more of white color:

Take now the Ellipse Tool (U) and make a circle:
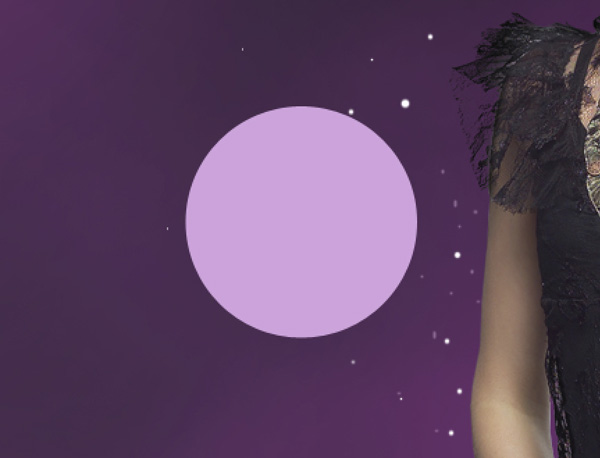
Set Fill to 0% for this layer:

Next select the Layer Style. Make a double click on the left mouse’s button on this layer on the layers’ panel and set the Gradient Overlay as shown:
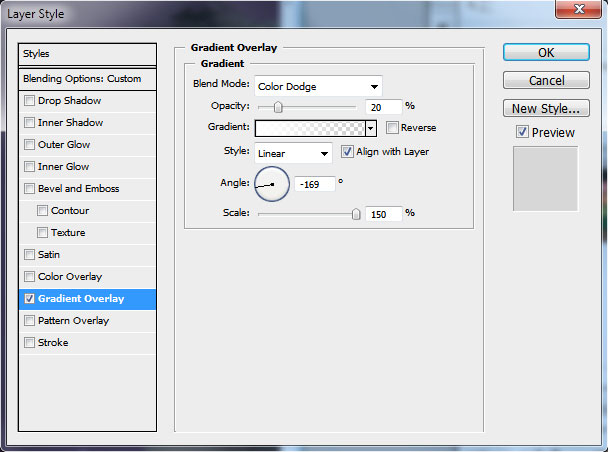
We’ve got a kind of half – transparent circle:

Copy them out (Ctrl+J) and put them arbitrary on the layer, using the Move Tool (V)


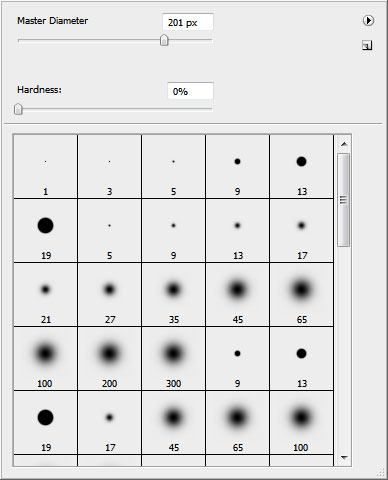
Create a new layer and represent on it a kind of luminescence around the girl. The brush’s settings are demonstrated below. Opacity 10%.

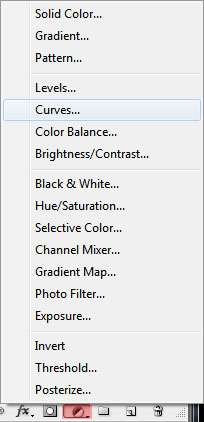
Next insert the adjustment layer Create new fill or adjustment layer > Curves:
Set it:
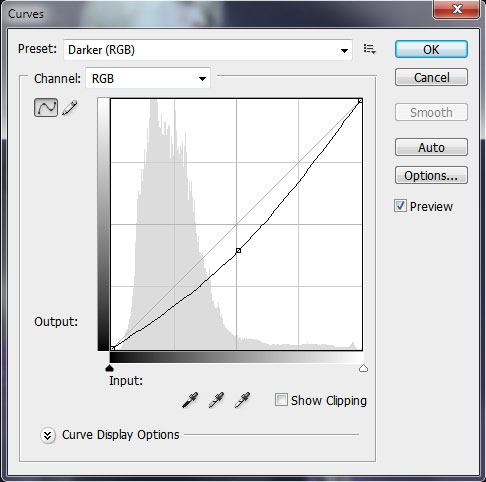
This way, our work became more contrasting and saturated.

Make one more circle using Ellipse Tool (U):

Set the Fill to 0% and Opacity to 70% for its layer:

Next select the Layer Style. Make a double click on the left mouse’s button on this layer on the layers’ panel and set the Inner Shadow as shown:
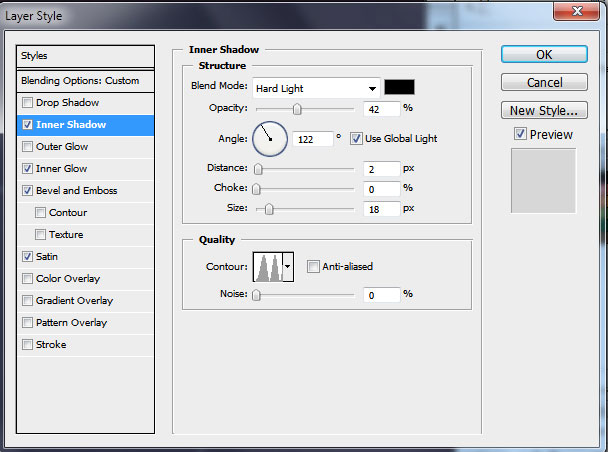
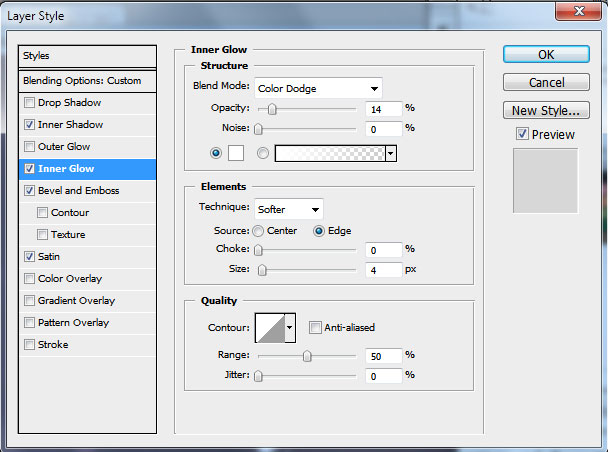
Add Inner Glow:
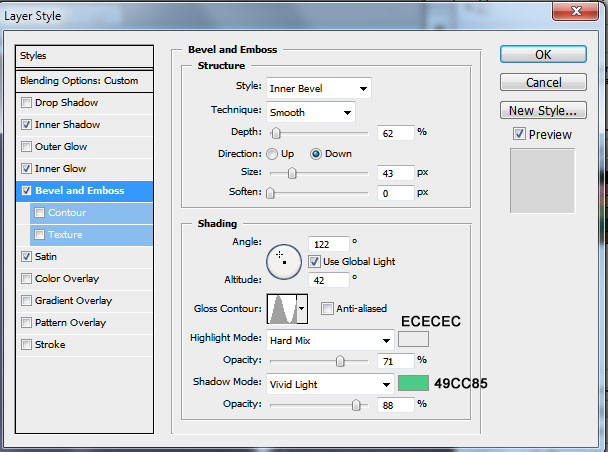
Set Bevel and Emboss:
Add Satin:
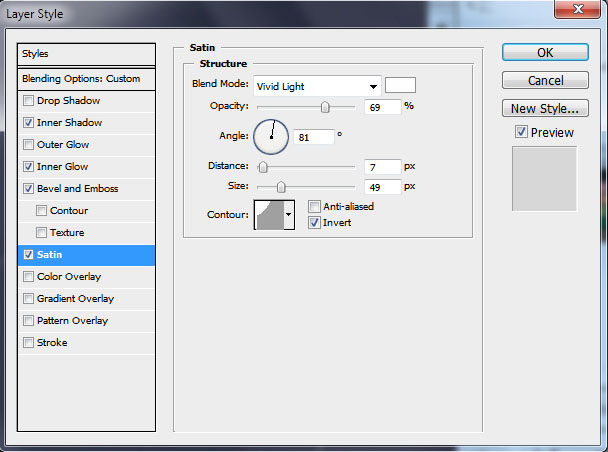
We’ve got a soap bubble:

Make a copy of it and try to distort it, using the Ctrl+T shortcut, have a right click on it and choose out of the list the Warp option:
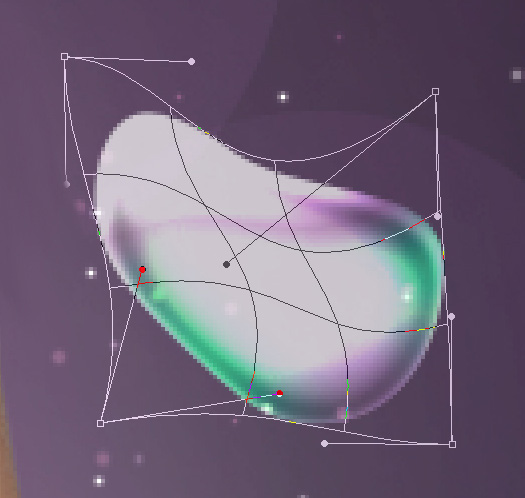
It’s the result you should get on this stage:

On a new layer we’ll represent several lines with the brush:

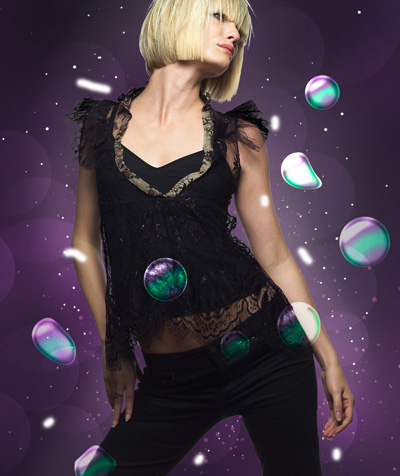
Smudge them out, applying the Smudge Tool (R) with the Strength on 50%.

Set for this layer Blend Mode to Overlay:


Make a copy of this layer:

Choose on a new layer a brush of white color, Opacity of 10%.
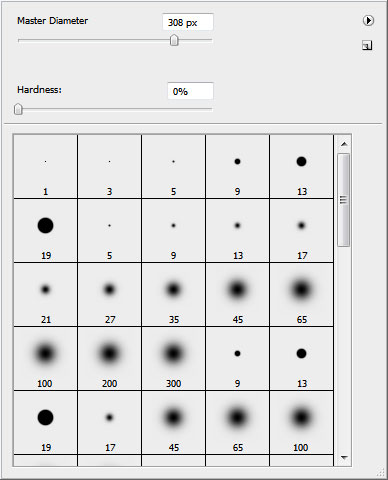
We’ll represent the fog on the picture:

Set for this layer Blend Mode to Overlay:

It’s the result we’ve got:

On a new layer we’ll represent more dots using Brush Tool (B) of the color #EC008C.

… approximately like on the picture:

… and insert several white ones:

Make a copy of the layer containing white dots and select then Filter>Blur>Motion Blur.
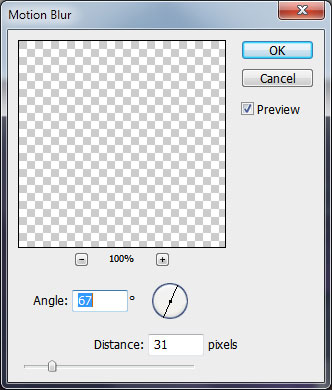
We’ve got the dynamics effect for the dots:

The final result!

Tidak ada komentar:
Posting Komentar