
Preview of the Final Product

Abstract FX Text Effect Photoshop Tutorial
Step 1 - Create a new Document
Choose File > New (Ctrl + N). I'm using a wallpaper of 1440px (width) X 900px (height). You can have a wallpaper of any other size. The background color should be black.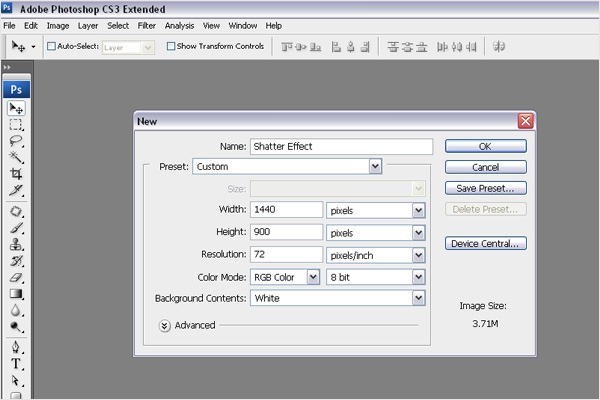
Step 2 - Create a Text
Type the text that you want to work with. I'm using "FX" as my choice of text, but you can use anything else. The font color should be white. I'm using the font "Harabara".
Step 3 – Rasterize the Text
Next, we need to duplicate the layer (Layer > Duplicate Layer). Right click on the duplicated layer then click Rasterize Type.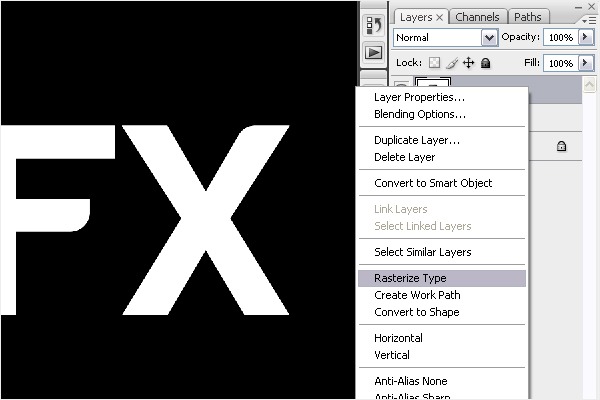
Step 4 - Adding Satin Style
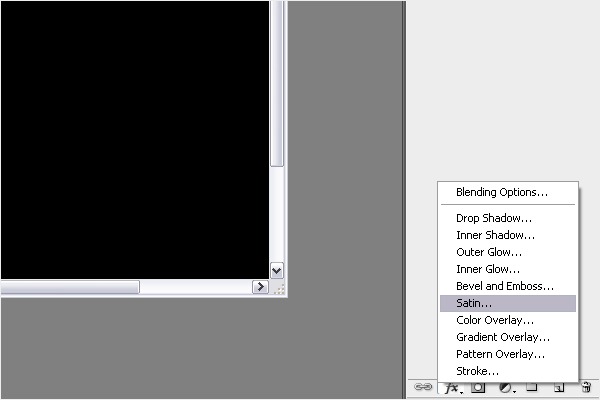
Click Layer Style (fx) in the layer palette, and select Satin, then enter the settings below:- Blend Mode: Multiply
- Opacity: 100%
- Angle: 143°
- Distance: 3px
- Size: 3px
Step 5 - Adding Bevel and Emboss
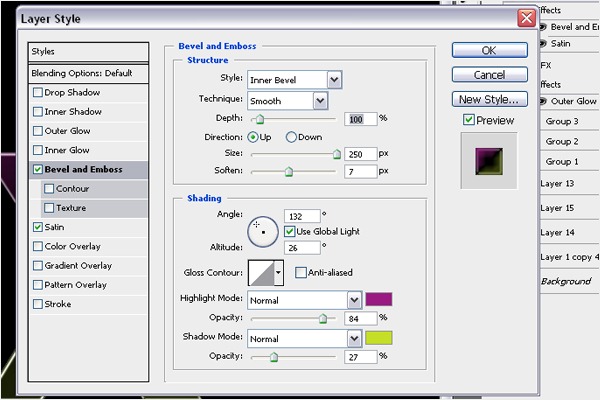
Adding Bevel and Emboss will shed a smooth light shade on the text. "Bevel and Emboss" is just above "Satin" that you clicked on in the previous step. Apply the following settingsStructure
- Style: Inner Bevel
- Tech: Smooth
- Depth: 100%
- Direction: Up
- Size: 250px
- Soften: 7px
- Angle: 132°
- Altitude: 26°
- Highlight mode: Normal
- Highlight Color: #9a1a82
- Highlight Opacity: 84%
- Shadow mode: Normal
- Shadow Color: #c5df27
- Shadow Opacity: 27%.

Step 6 - Adding Colors to Background
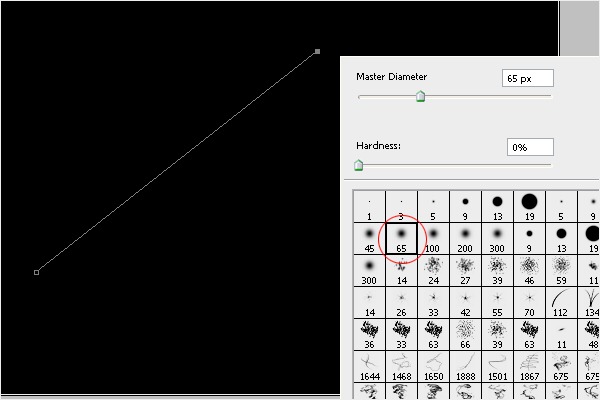
We shall now merge 4 different colors to create a colorful background.First, create a new layer to work on. Select Pen Tool from the tools bar on the left then create a path as you see in the image below with the gray line. Select Brush Tool (B) from the tools then right click on the screen. Select the feather brush, which I have highlighted with the red circle in the image below.
Go to the Pen Tool then change the foreground color to Pink (#FF00FC). Right click on the screen then select "Stroke Path". Choose Brush, activate "Simulate Pressure" (for soft and feathered edges), then click OK. We now have a path in pink.
Repeat this step three times but use different colors;
- Blue (#009CFF)
- Green (#46FF00)
- Yellow (#FFF700)
Step 7 - Merging Background Colors
Select all the layers & Merge (Ctrl + E). Now all the effects we've done appear on the same layer.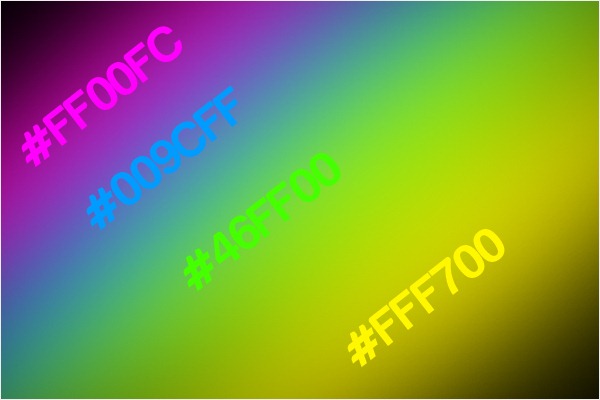
Step 8 - Making Soft & Smooth Color Shade
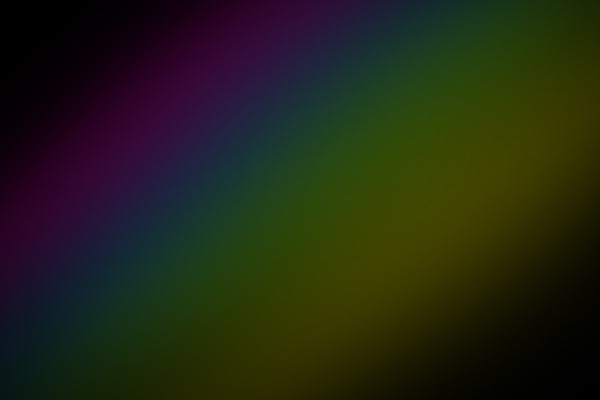
The way to create soft & smooth edges for the colors: select Menu > Filter > Blur > Gaussian Blur > Radius = 66.4px, and reduce the opacity to 33%. You should have a background image similar to this one below.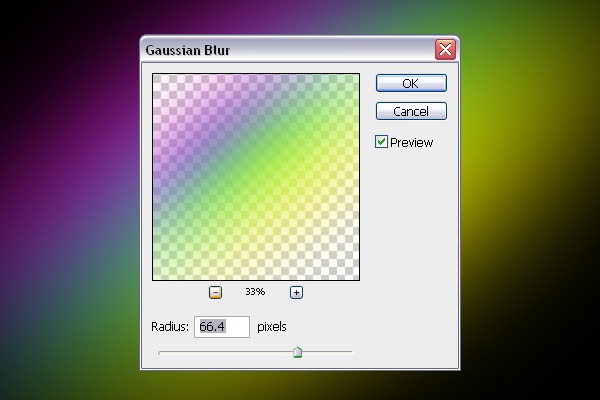
Step 9 - Duplicating Layer to Add Glow behind the Text
Select the text as you see in the image. Click on Select > Modify > Expand = 2px. Create a new layer below the text. It should be white.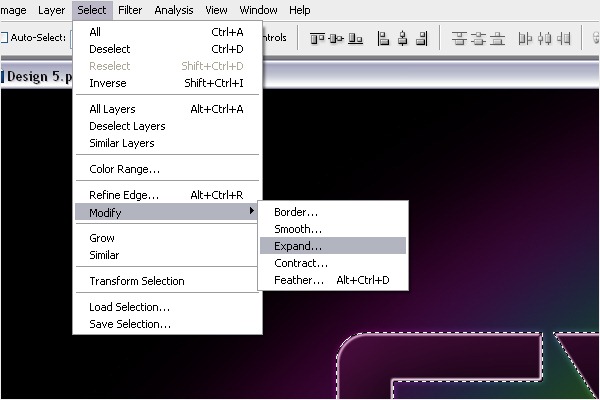
Step 10 - Adding Blur
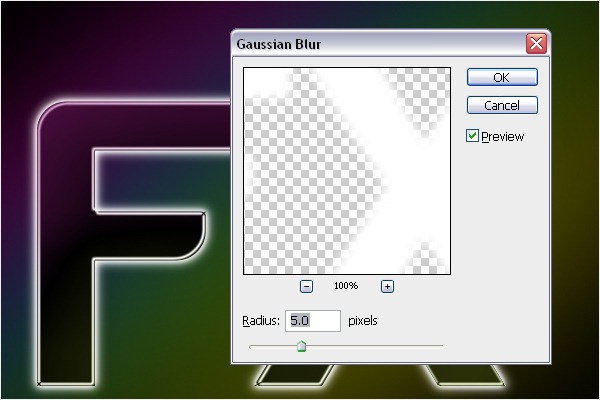
In order to make the text smooth, we need to choose Filter > Blur > Gaussian Blur (Radius = 5px).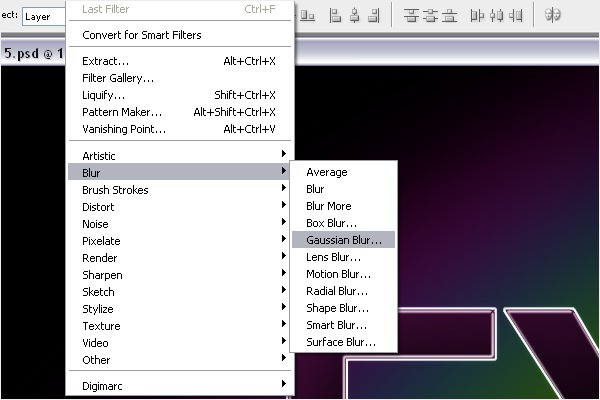
Step 11 - Filling Colors
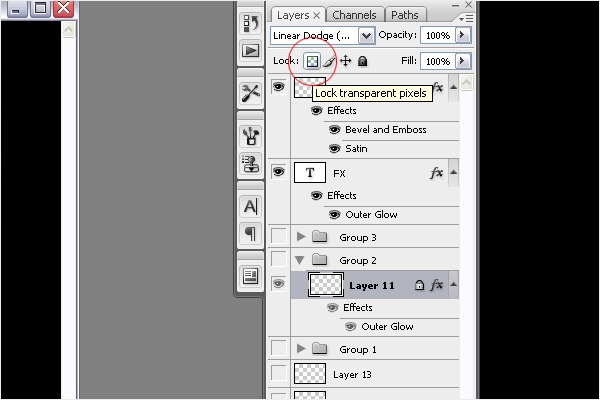
Our goal is to fill 4 different colors inside the text. Select the blurred text & lock it. Then go to the tools bar & select Brush Tool (B) > right click on the screen & select the feather brush.Fill the 4 different colors that we used in Step 6. See the image below for reference. You should end up with a picture the same as the final image below.


Step 12 - Adding Effects on the Text
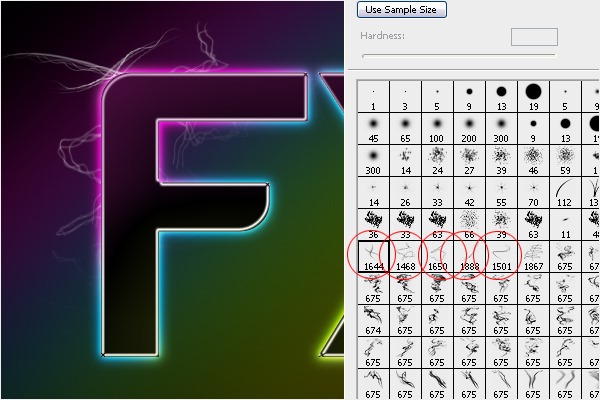
Now is the fun part. We're going to add some cool effects to the text with the Brush. You can download the Brushes we need from this link: http://myphotoshopbrushes.com/brushes/id/328Create a new layer and name it "brush design". Select Brush Tool & set the foreground color to white. Select the brushes that you just installed, and add the effect to the corners of the text as you see in the image below. Do the same for all the corners of your text. The final image below should give you a rough idea of what the product should look like.

Step 13 - Adding colors to the Brush
Choose feather brush > choose the same colors as in Step 6 & lock the brush design layer > fill it according to the background colors. Then go to Layer > Blending Mode > Linear Dodge (Add).

Step 14 - Adding Glow to the Brush Design
Applying some glow to the design around the text will help the design stand out even more. Choose Outer Glow from layer style then follow the settings as you see in the image below.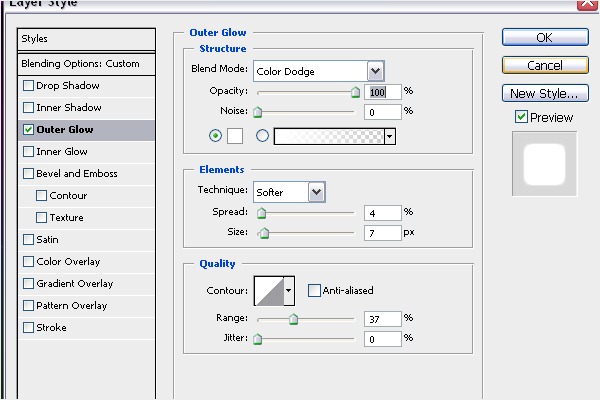

Step 15 - Adding Special Effects (a)
Before we can add special effects behind the text, download the Real Smoke Photoshop brushes. After you've installed them, choose the brush that I've highlighted in the red circle.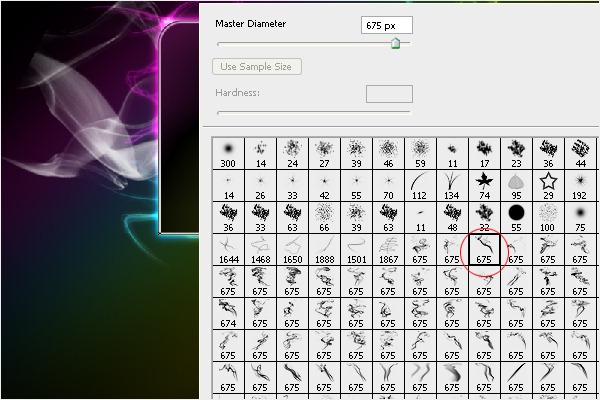
Step 16 - Adding Special Effects (b)
Create a new layer, press D to reset the color & press X to bring the white on top. Place the selected brush & turn the layer to horizontal. Fill the color and repeat what you did in Step 11.
Step 17 - Adding Stars
Download this set of particle and star Photoshop brushes. Select Pen tool to create a wave path. Switch to the Brush tool then right click on the screen. Choose the star brush as you see in the image below, select Pen Tool, then right click on the screen and select "Stroke Path". Choose Brush and activate "Simulate Pressure" then click OK. Change the Blending Mode to "Color Dodge".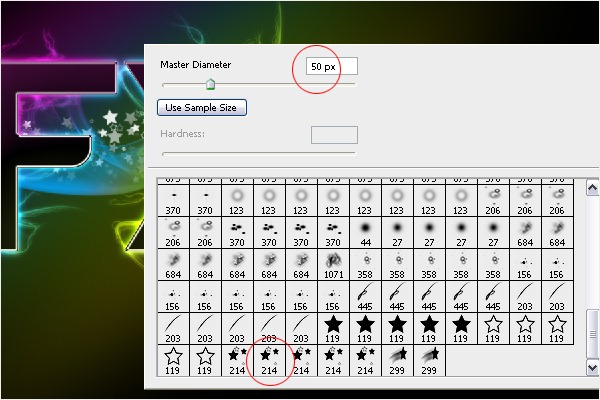

Step 18 - Final Touch
You can use Particles from the Brush. Click on the screen then apply the Eraser Tool (E) and erase around the layout, so the particles will be highlighted only around the glowing text.

Tidak ada komentar:
Posting Komentar