
Tutorial Assets
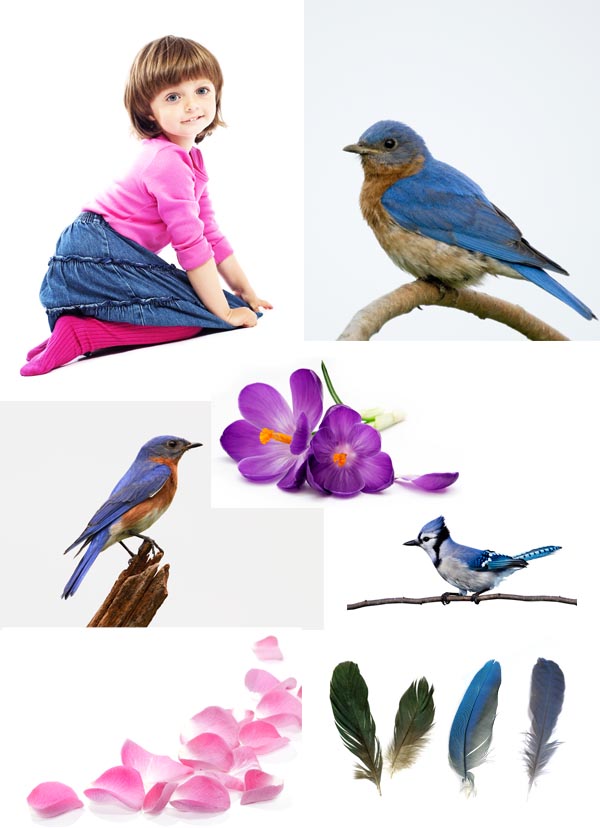
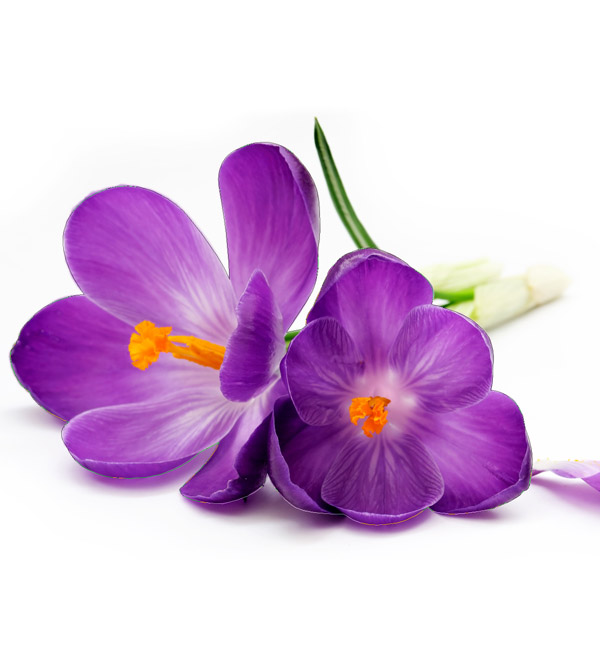
The following images were used during the production of this tutorial.Introduction
Make sure that when you begin a project like this that you start out with some good high quality photos. If you like, feel free to use the images above. You can also attempt this project using photos of your own choosing. In addition to high quality images, you will also need a graphic tablet.The Creation Process
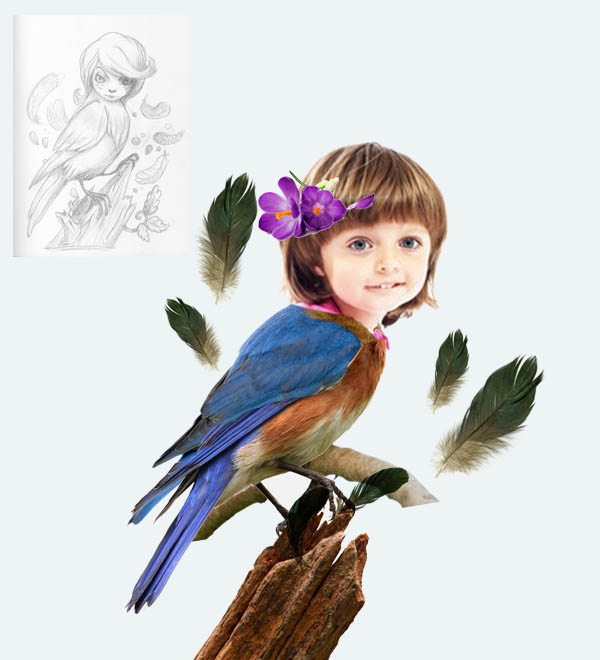
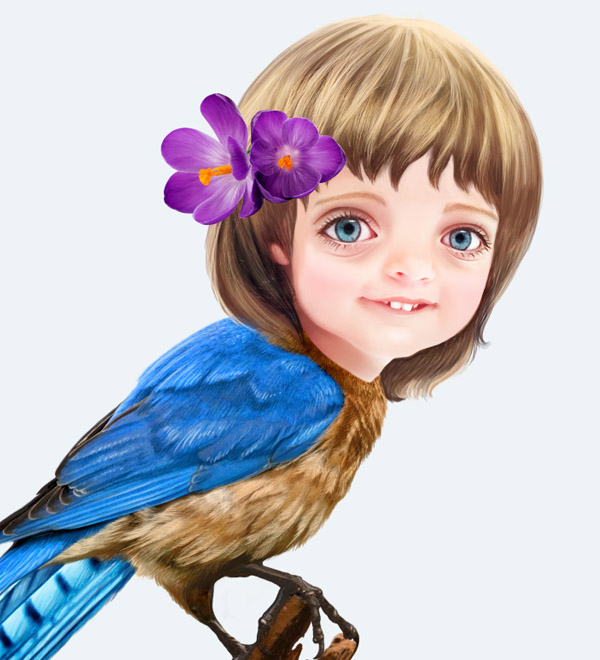
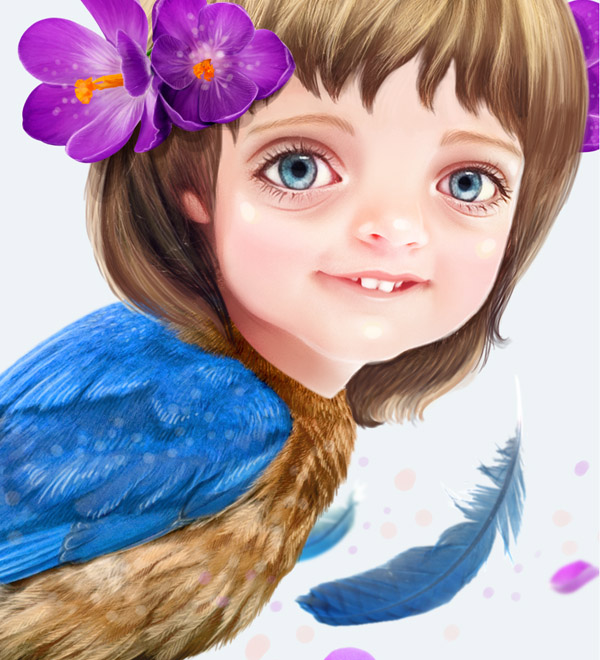
I began this illustration with a sketch of what I wanted to create. Then, I began searching for suitable photos. I found this photo of an adorable little girl, which I decided to use. Then I incorporated some other images that I found as well. Once that was done, I made a rough composition in Photoshop using the images that I found.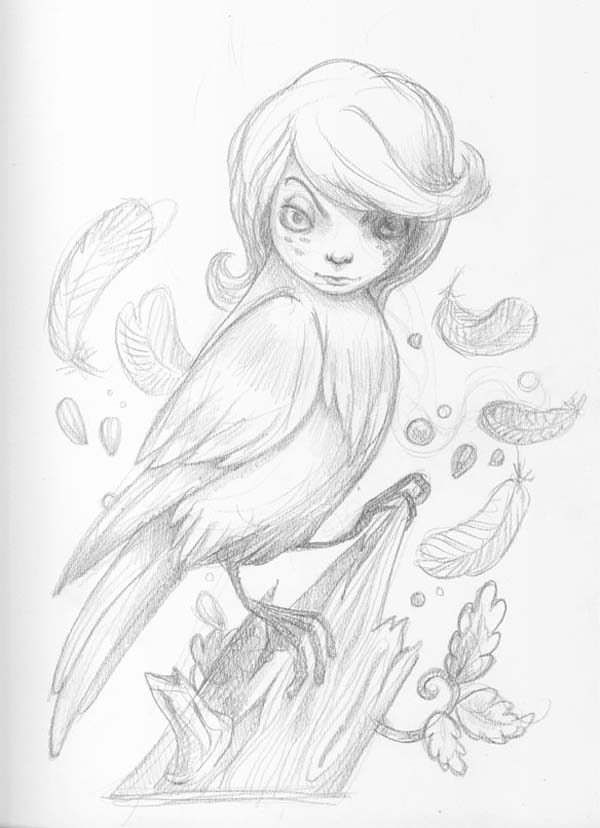
Step 1
Create a new document in Photoshop. I used 2000x2200px 300dpi canvas. Fill the canvas with a very light blue color #EEF3F6.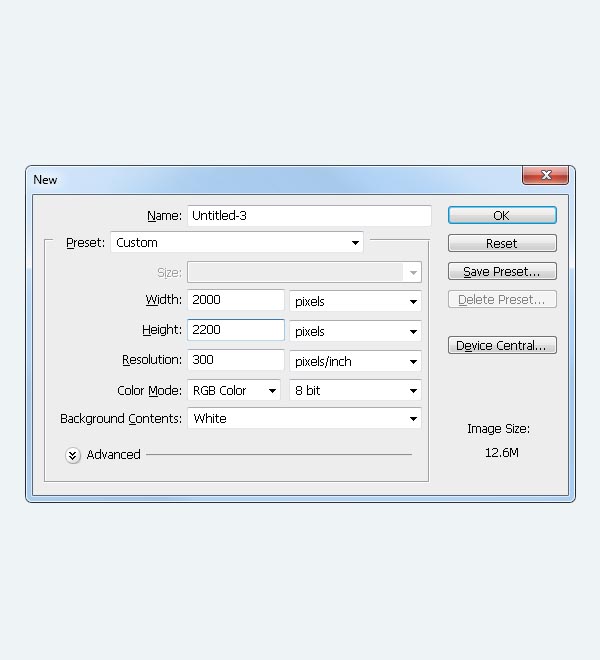
Step 2
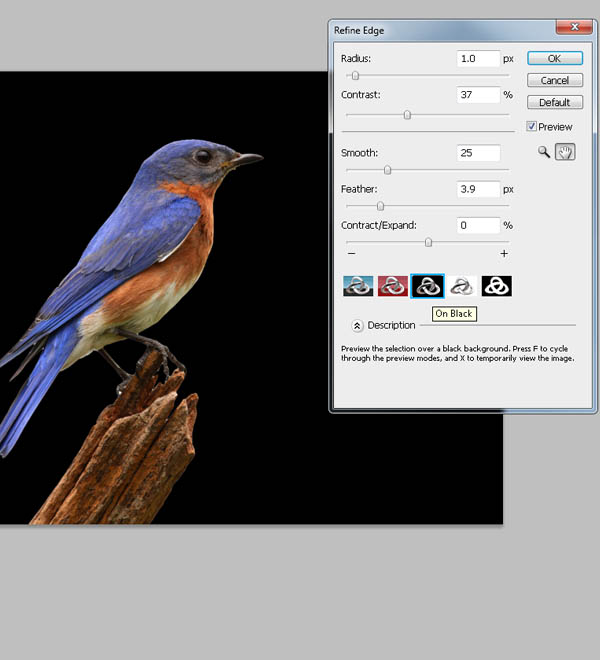
Open Bird1.jpg. Use the Magic Wand Tool (W) to select background around the bird.
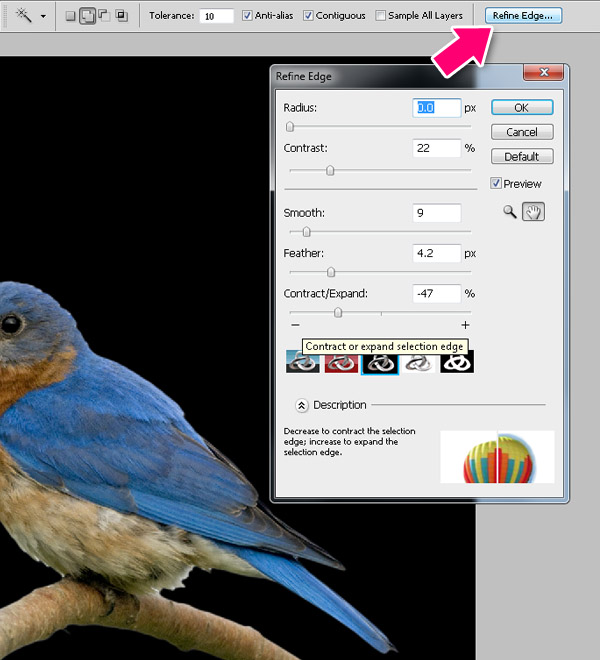
Step 3
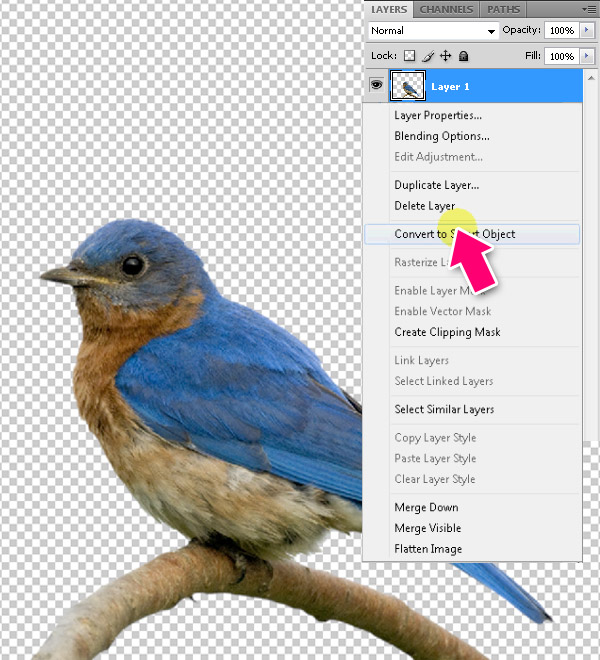
Now let’s bring in the girl. Using the Pen Tool (P), select the girl’s head, then press Cmd/Ctrl + Enter to convert the path into a selection. Press W, then press Refine Edge and use the same values we used for the bird. Then press Cmd/Ctrl + Shift + J (Layer via Cut), and convert the new layer to Smart Object.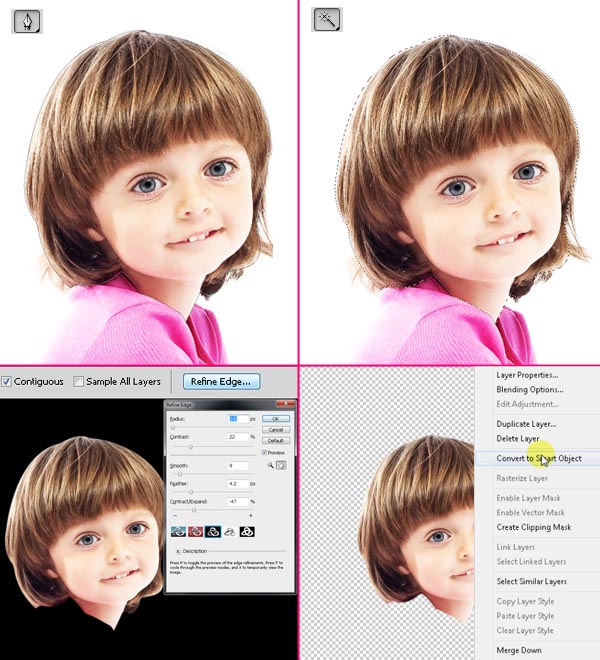
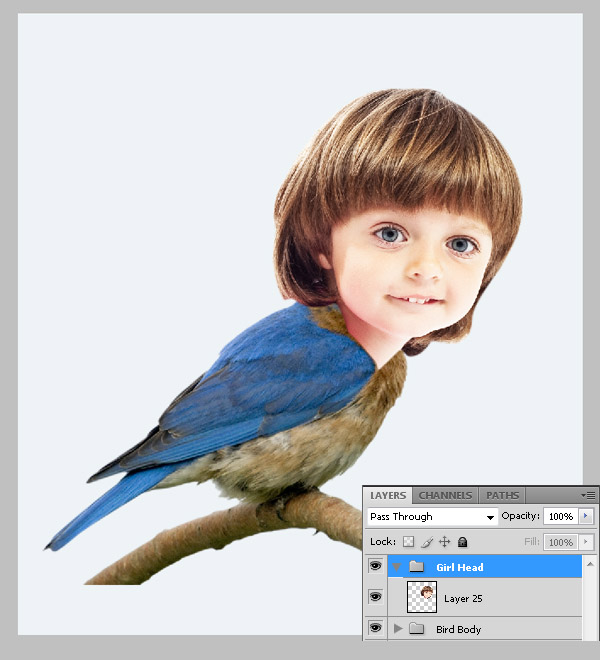
Step 4
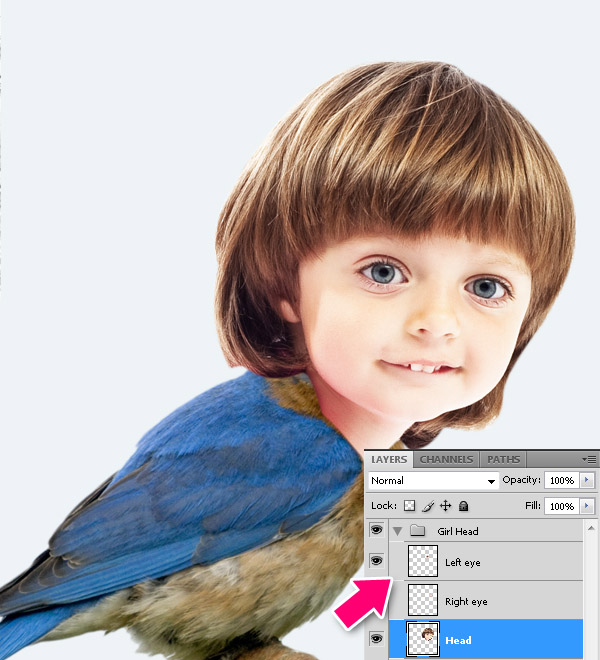
Let’s make her eyes bigger! Select the left eye area using Lasso Tool (L) with like 10px feather to soften the edges around the selection. Then press Cmd/Ctrl + J (Layer via Copy) to copy the eye to the new layer.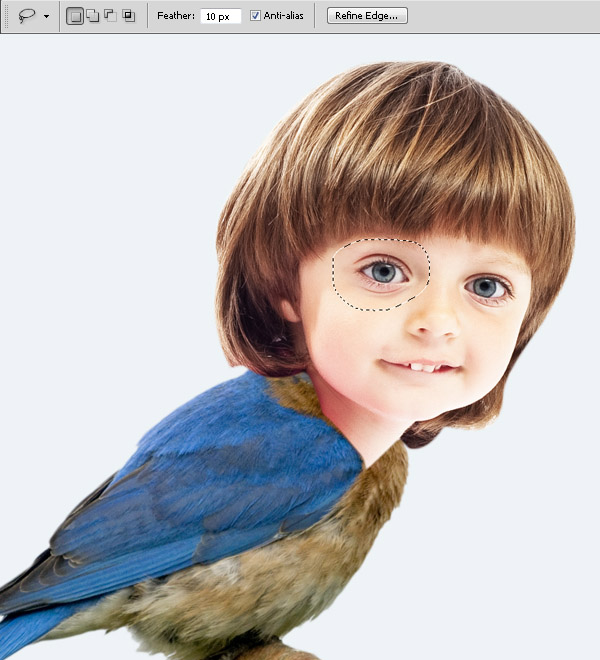
Step 5
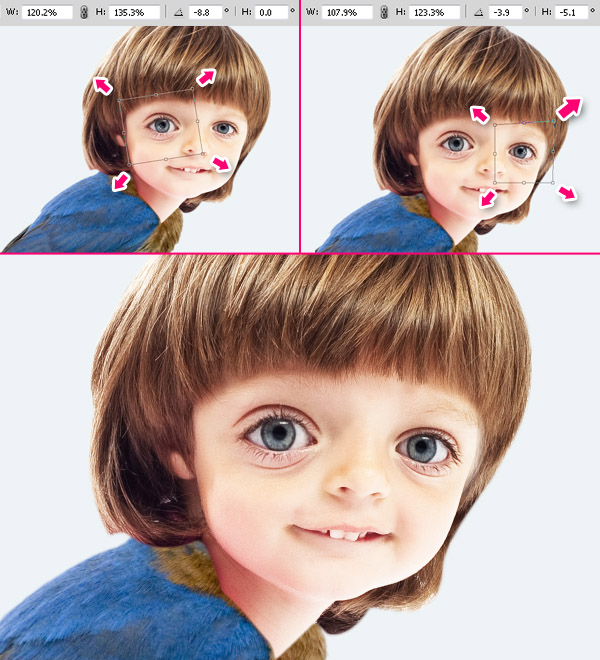
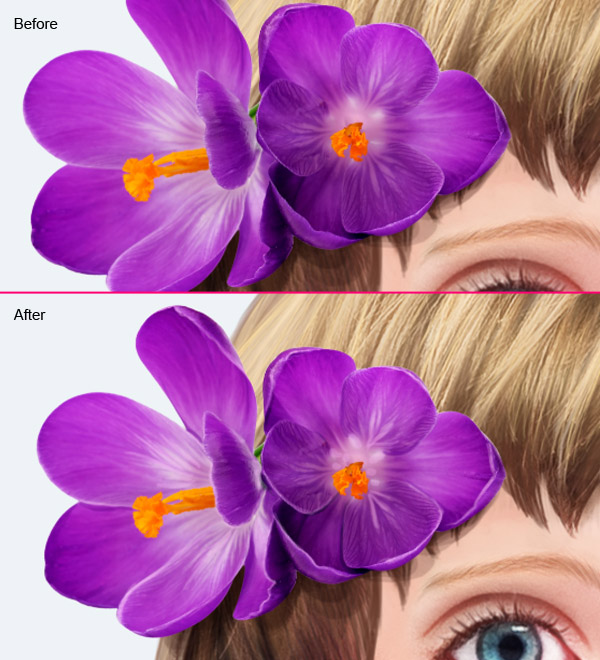
Select the "Head" layer and go to Filter > Liquify. Use Forward Warp Tool with 200px brush and make changes as shown below. Slightly change shape of the face, enlarge the distance between the eyes in the district for the nose, lift up mouth and nose. Click OK to apply the changes. Well here we are finished changing the face, now let’s paint for variety.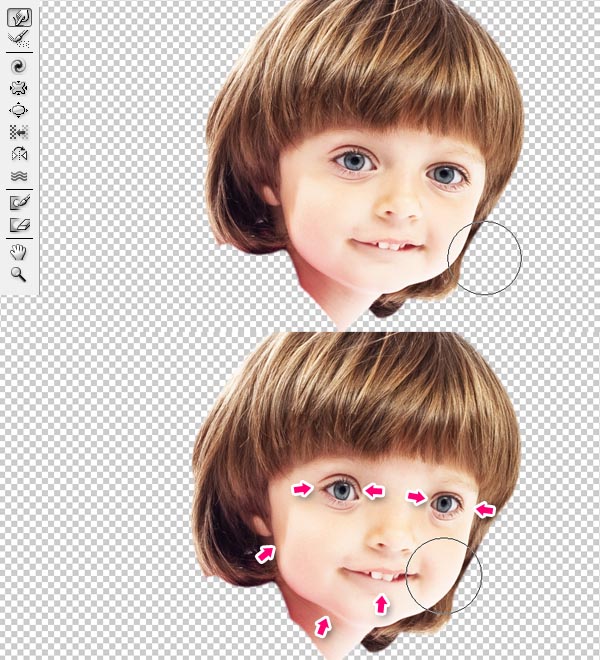
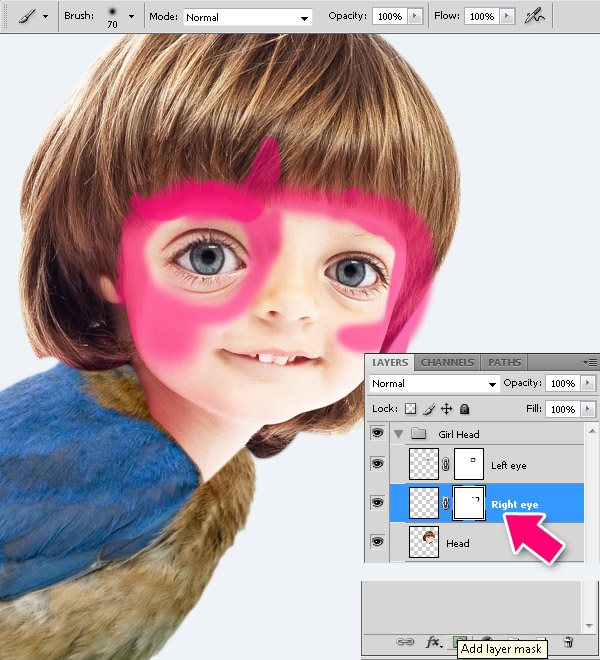
Step 6
Create a new layer by clicking on the Create a New Layer icon in the layers palette. Then hold Alt and click between the "Head" layer and a new layer to create a clipping mask.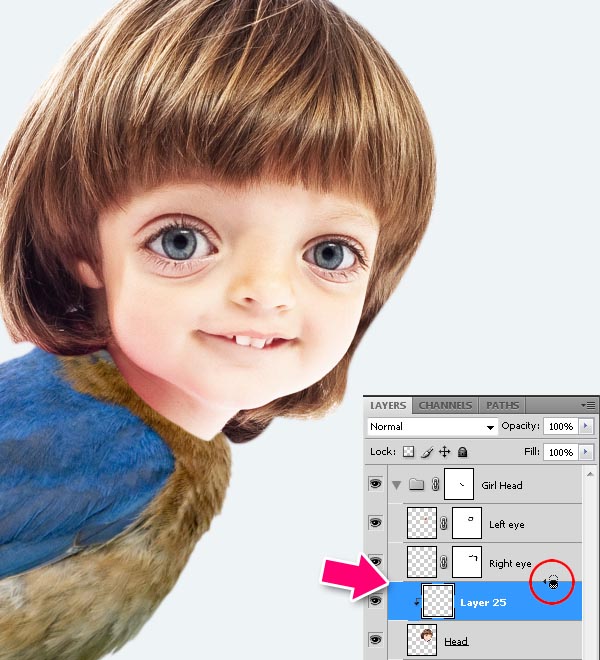
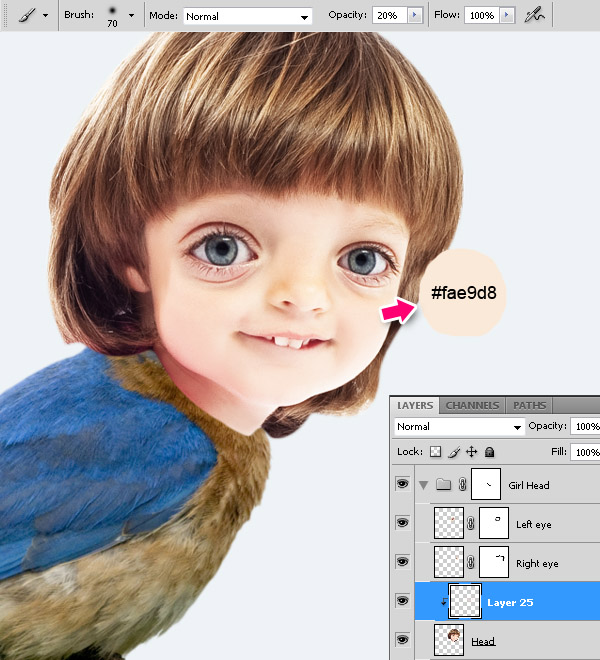
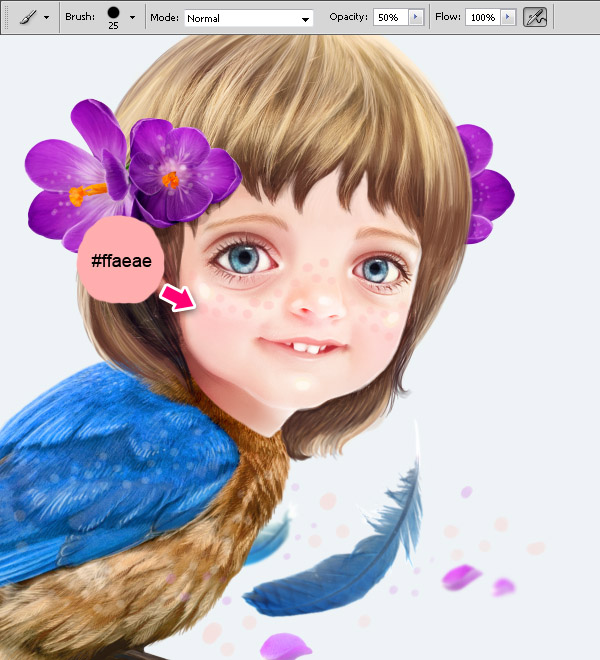
Step 7
Now, using a large soft brush with 20% opacity, paint on new layer with pink the cheeks and nose area and around the eyes as shown below. Set the layer blending mode to Overlay.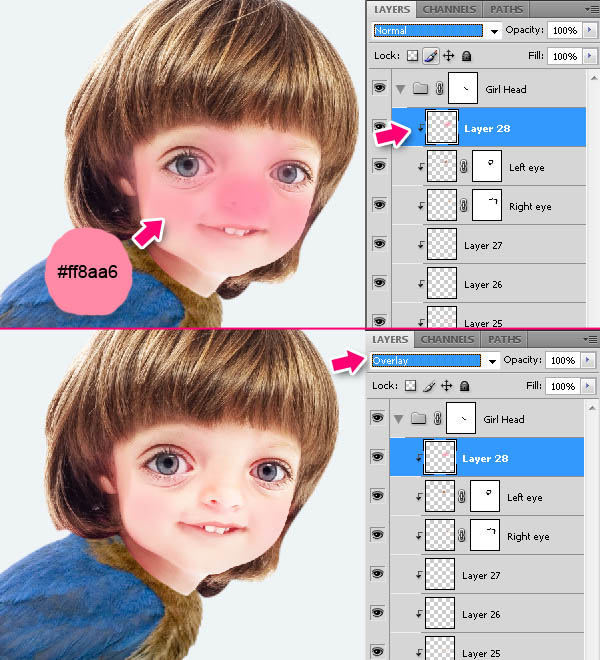
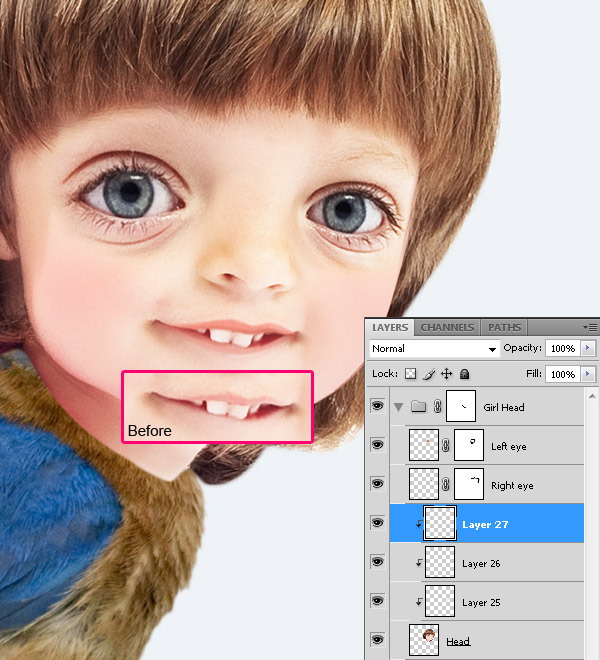
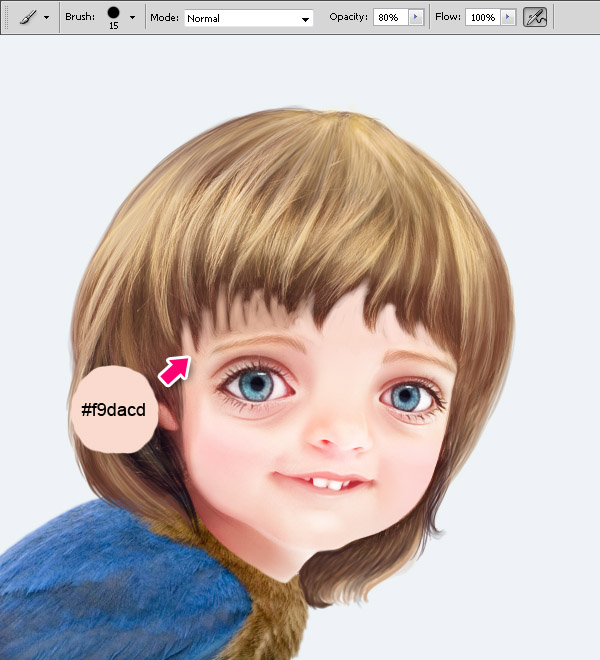
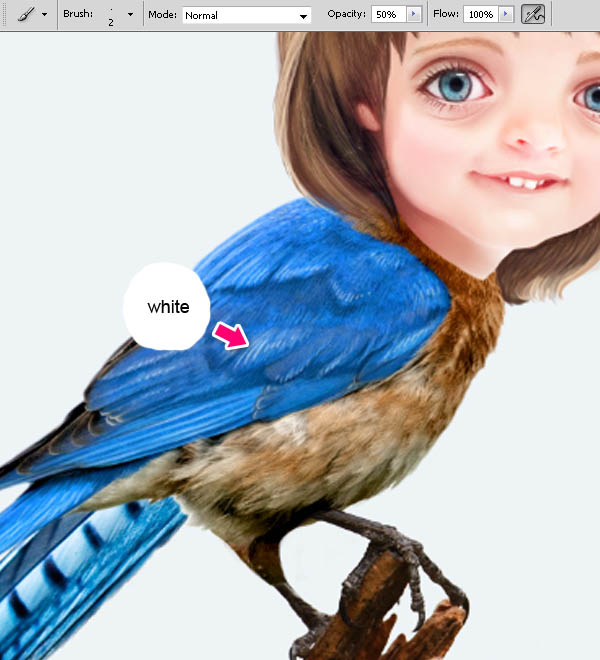
Step 8
Next we will add some glare. Using a hard transparent brush, paint a very light pink onto the highlighted areas of the face, then using a smaller brush, fill with white, the teeth and whites of the eyes.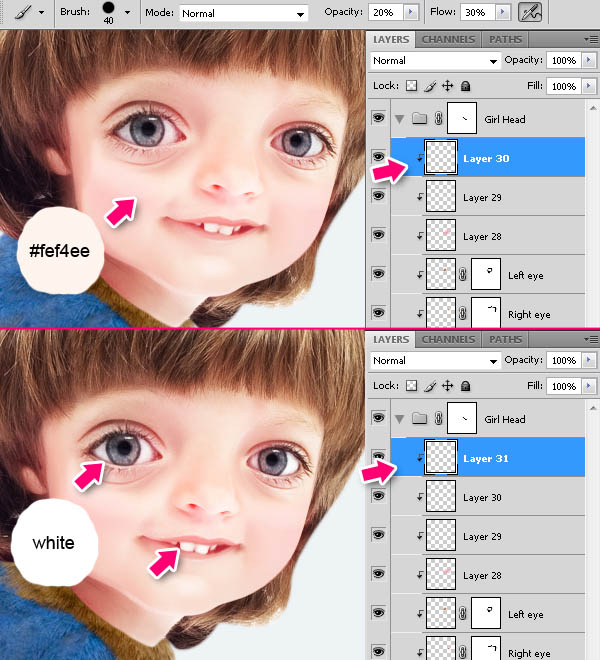
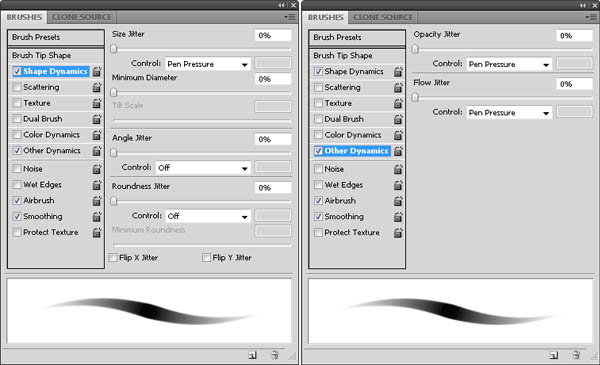
Step 9
Now, using a small soft brush with 20% opacity, paint with light blue, the pupils as shown below. Set the layer blending mode to Overlay and layer’s opacity to 60%.
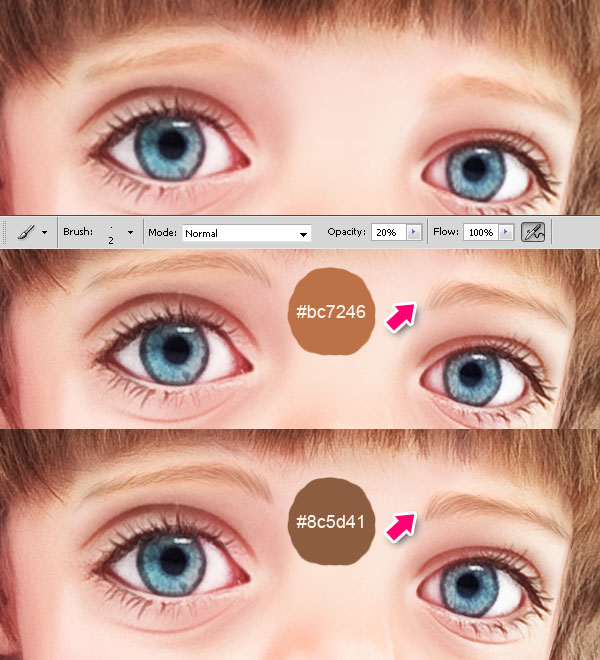
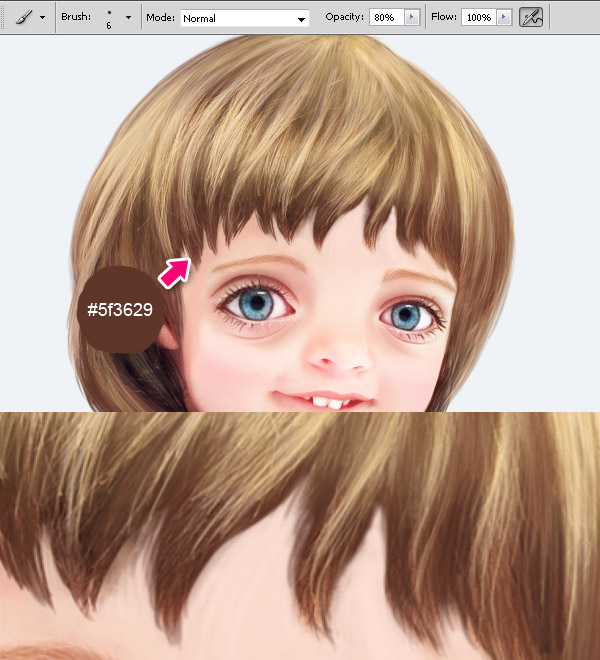
Step 10
Set your brush to 2px size, 100% opacity and 100% hardness. Draw eyelashes and eye contour with dark brown. Also, you can add some shadows over eyes using same color and large soft brush with like 10% opacity.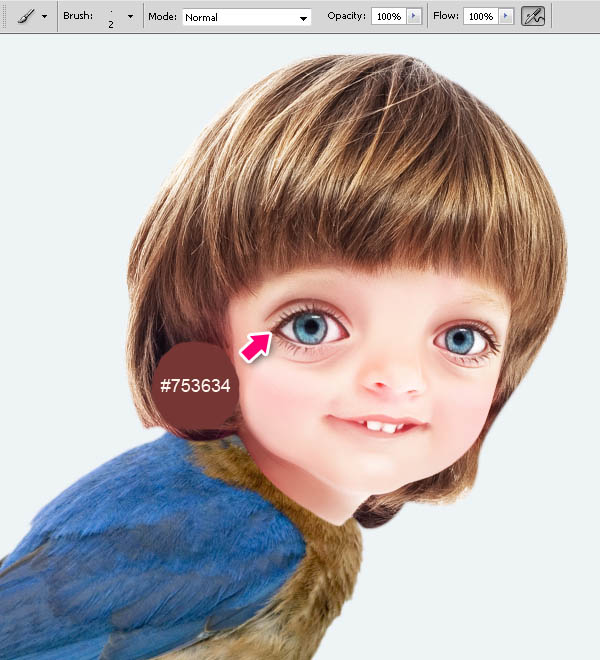
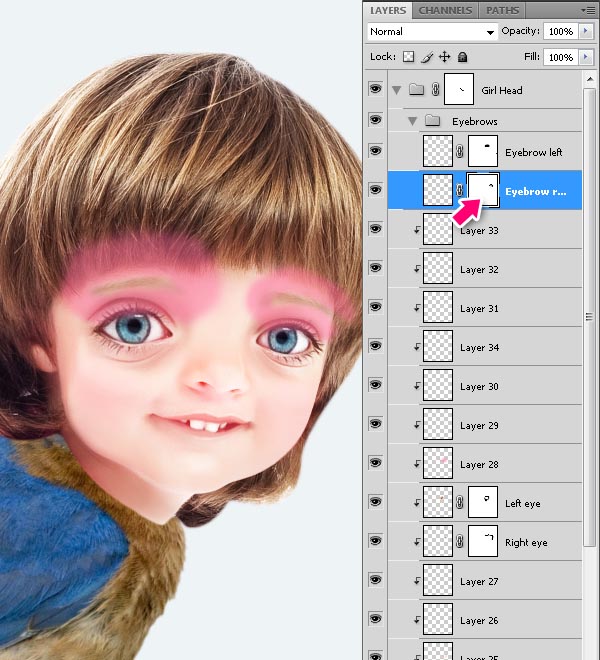
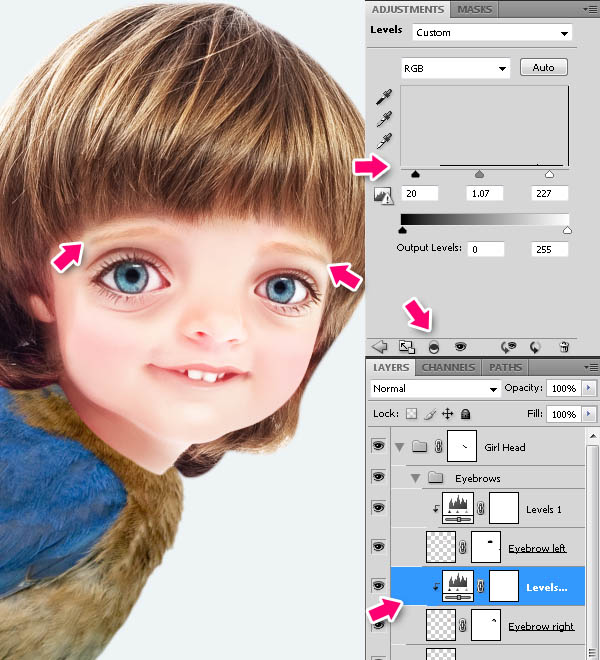
Step 11
She really needs some eyebrows! Open Boy.jpg. Using the Lasso Tool (L) with 5px feather, select the right eyebrow, convert it to Smart Object, then drag it to our painting and place as shown below. Do the same for the left eyebrow. Group both eyebrows layers (select layers and press Cmd/Ctrl + G).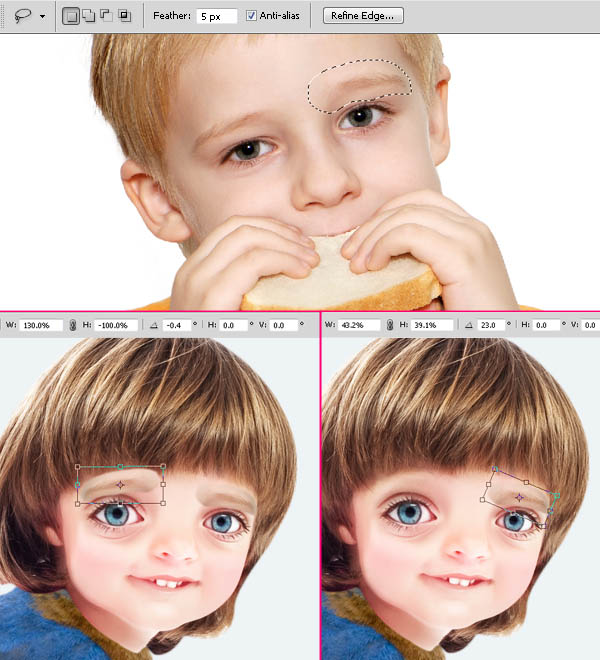
Step 12
We are now done with the face for the moment, now to the hair. It’s all about painting; basically all we are doing is painting over the photo, repeating hair structure and just adding more shape to it. We will still use the same brush we used in the beginning. Start painting using a large soft brush with 20-30% opacity to paint basic color. You can pick colors from the photo or choose others. Gradually reduce the size of the brush to paint the details. Paint each color on a new layer, it’s the easiest way to fix if something goes wrong. Finally you should get something like the image below.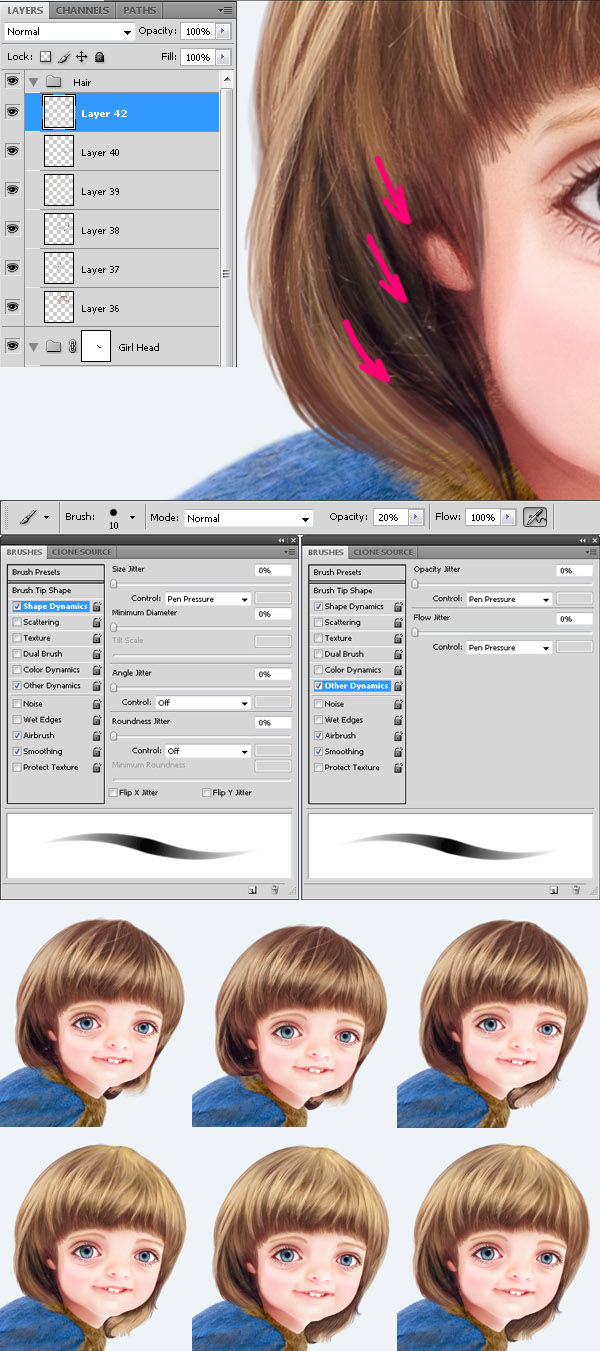
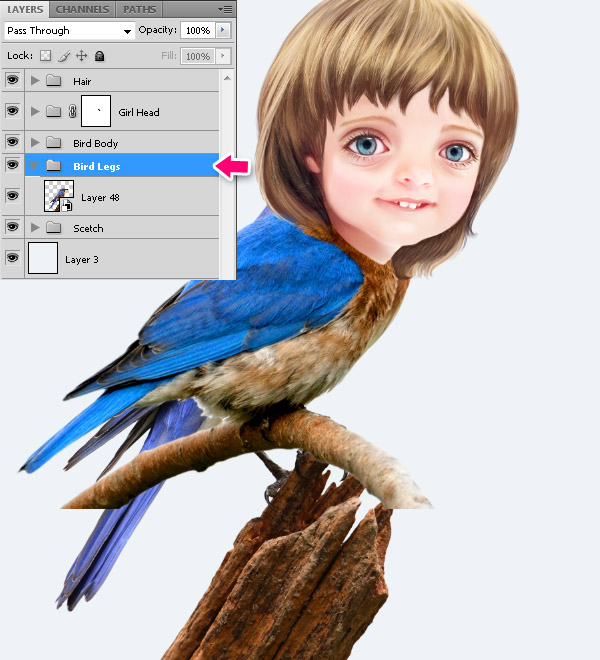
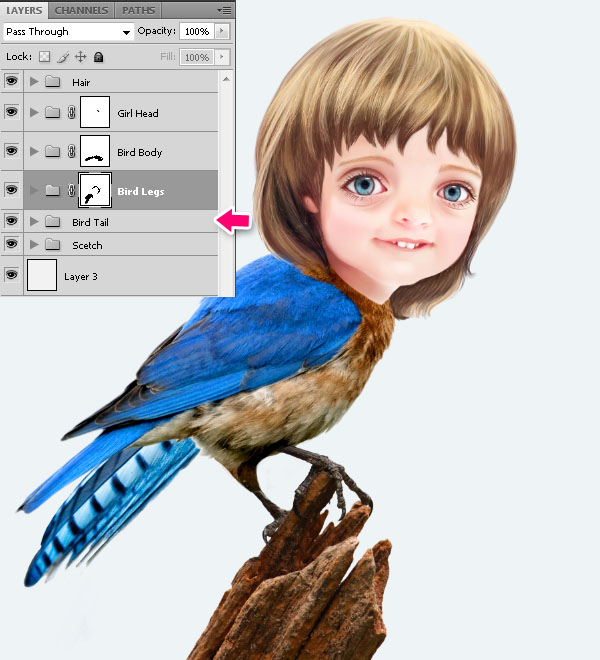
Step 13
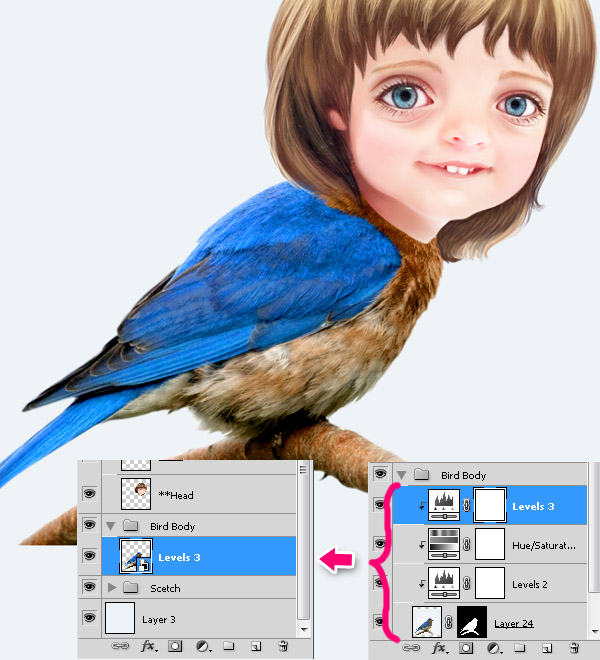
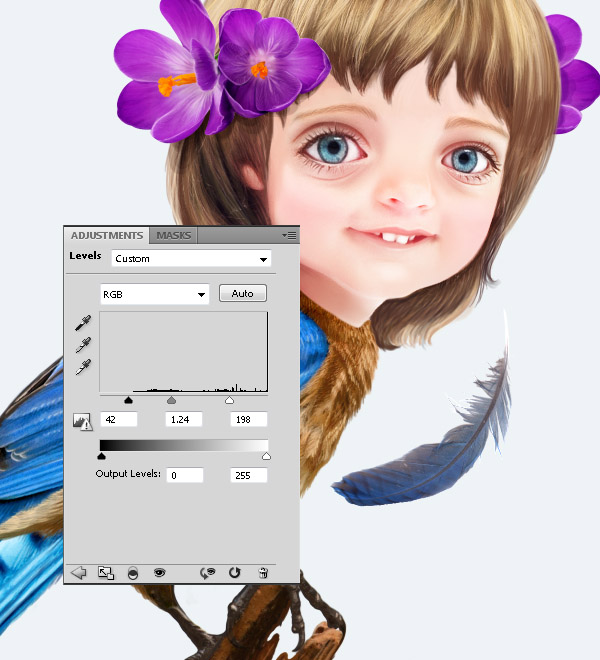
Let’s pay some attention to the bird. Select the bird layer and add adjustment layers as shown below. 1. Adjustment Layers > Levels. 2. Adjustment Layers > Hue Saturation. 3. On the same Hue/Saturation palette choose yellow from the drop-down menu. 4. Adjustment Layers > Levels. Then select the bird layer and all adjustment layers and convert them to Smart Objects.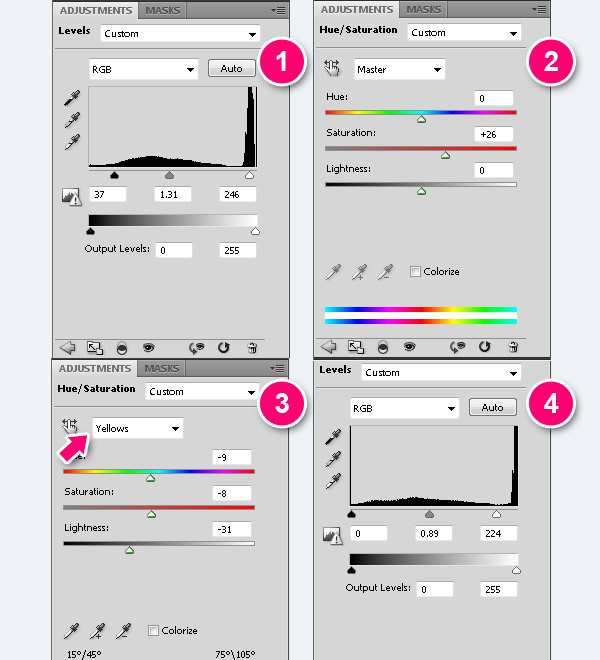
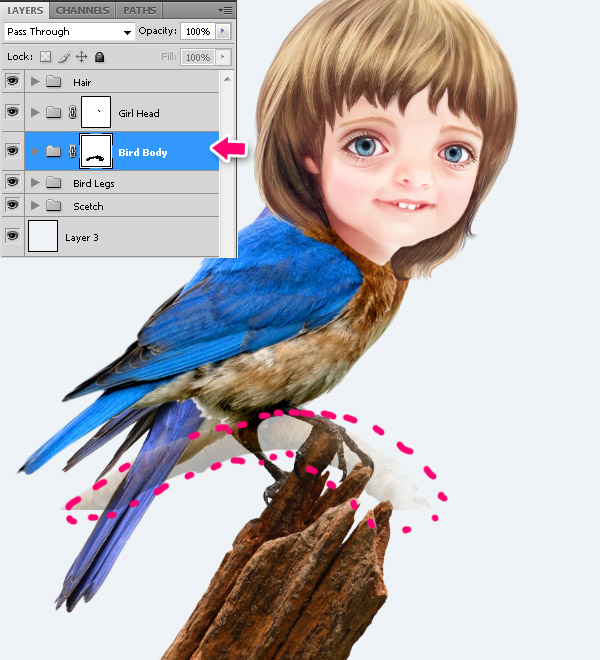
Step 14
Open Bird2.jpg.Use Magic Wand Tool (W) to select background around the bird. Then press Cmd/Ctrl + Shift + I to inverse your selection.
Press Refine Edge and change the values with the ones indicated below. Then press Cmd/Ctrl + Shift + J (Layer via Cut) to cut the selected bird to the new layer and convert it to Smart Object.
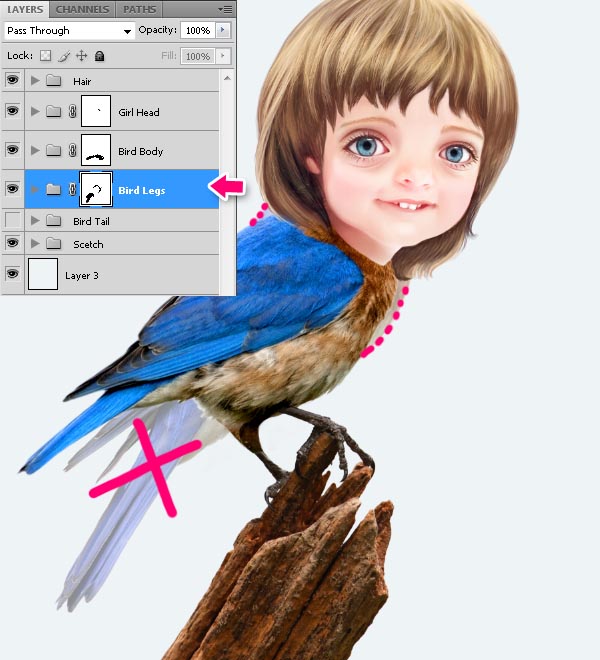
Step 15
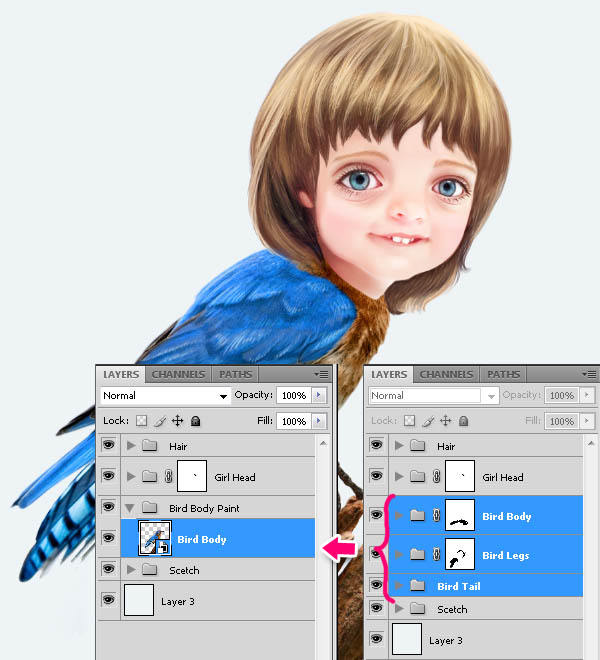
Open Bird3.jpg. Cut the tail and place it as shown below.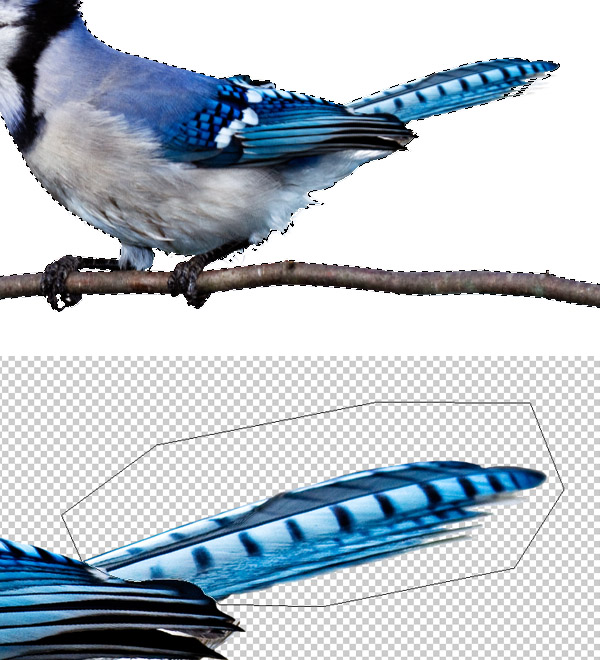
Step 16
Create a new layer above the bird’s body, fill with blue wing’s area and set layer opacity to 20%.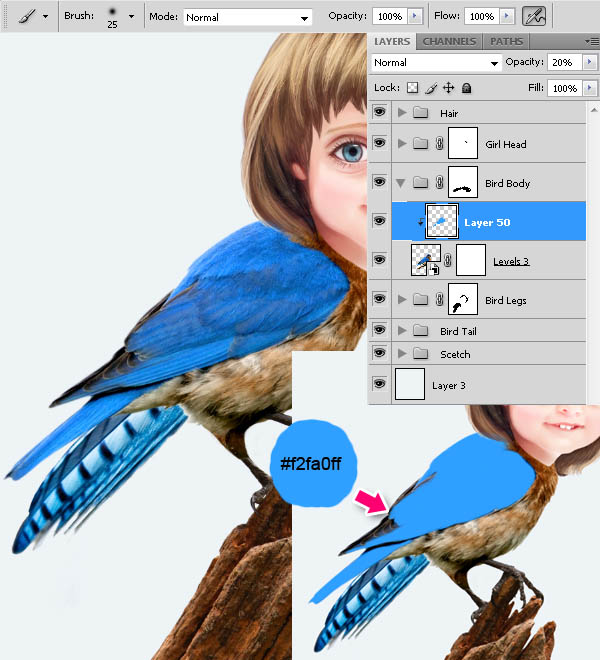

Step 17
Create a new layer above bird’s body, fill with brown body area and set layer opacity to 20%.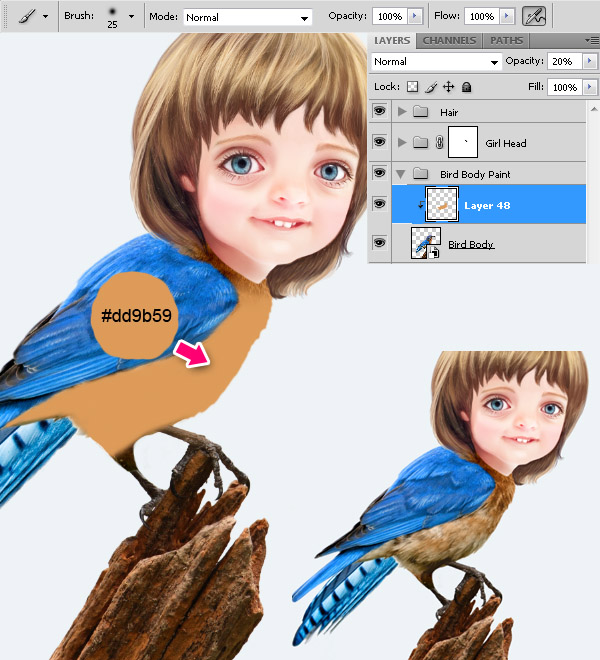
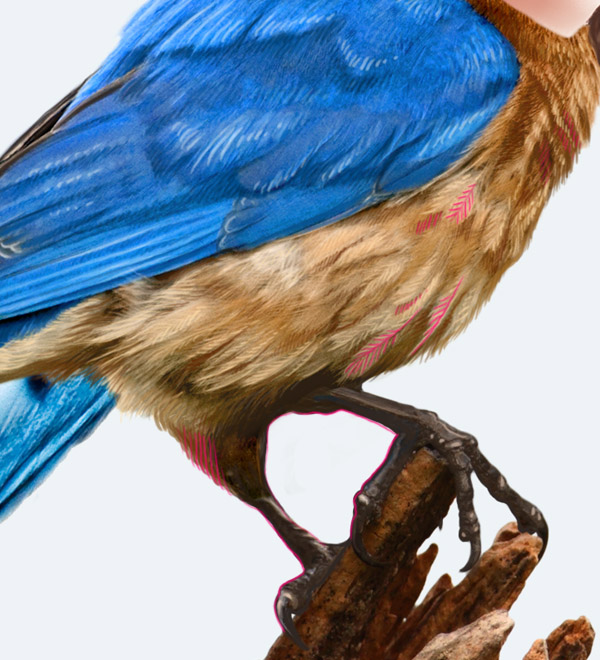
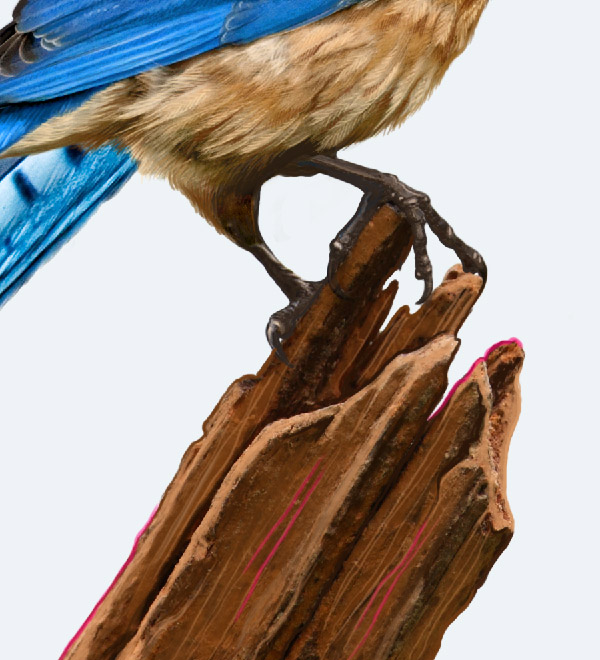
Step 17
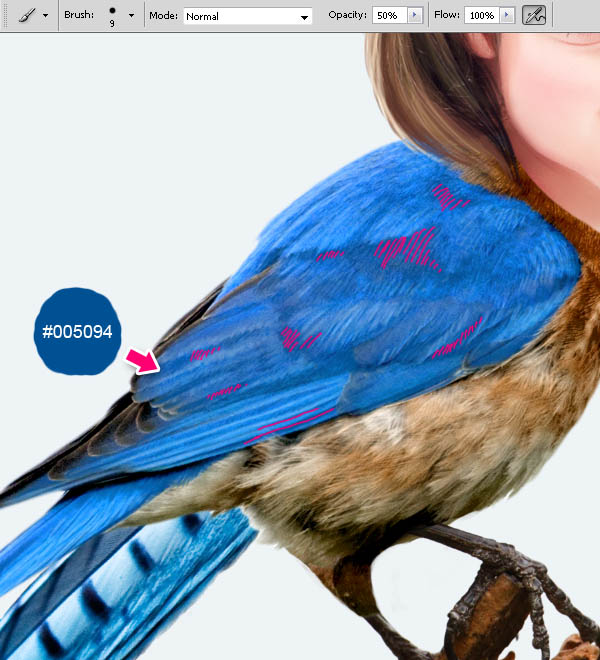
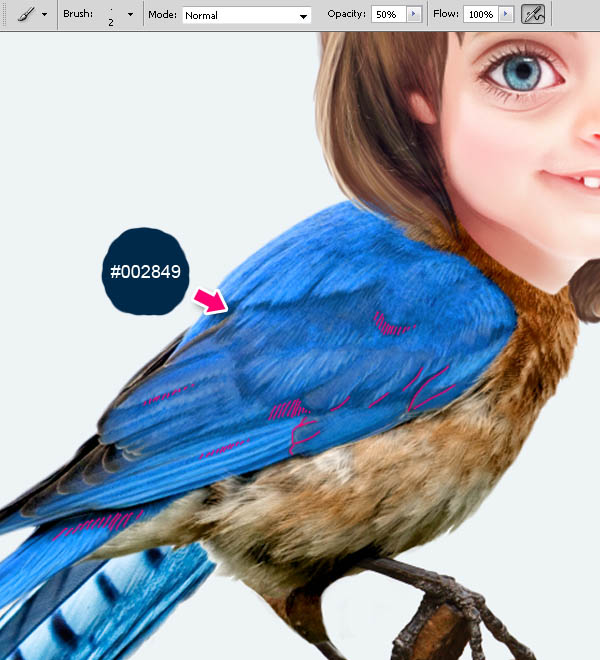
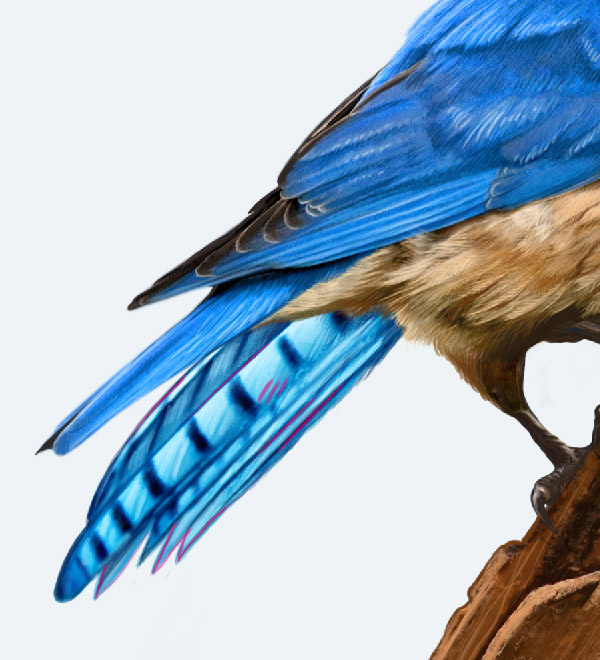
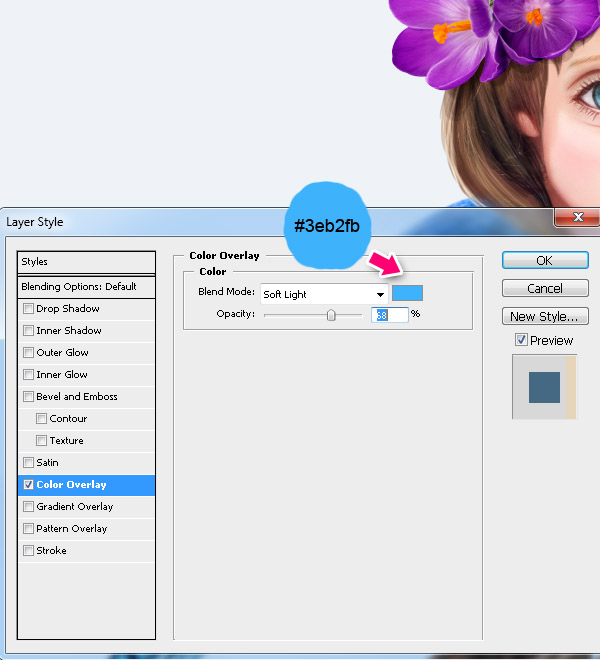
On the new layer, fill with blue tail’s area and set layer blending mode to Soft Light. And paint again.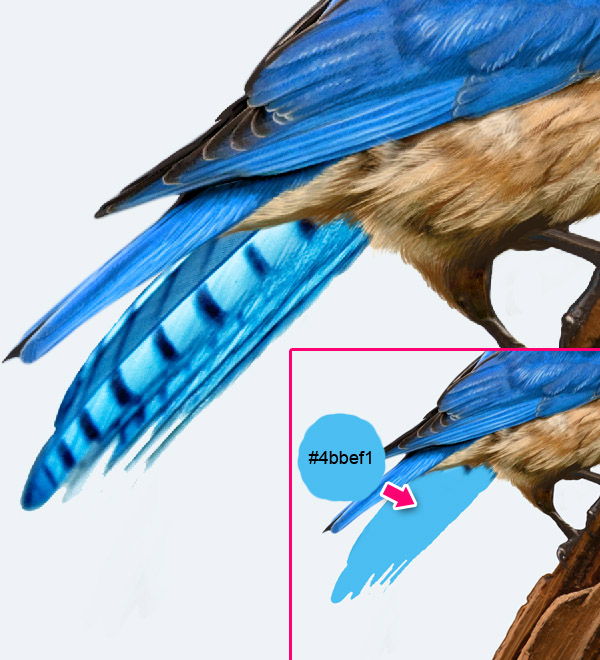
Step 18
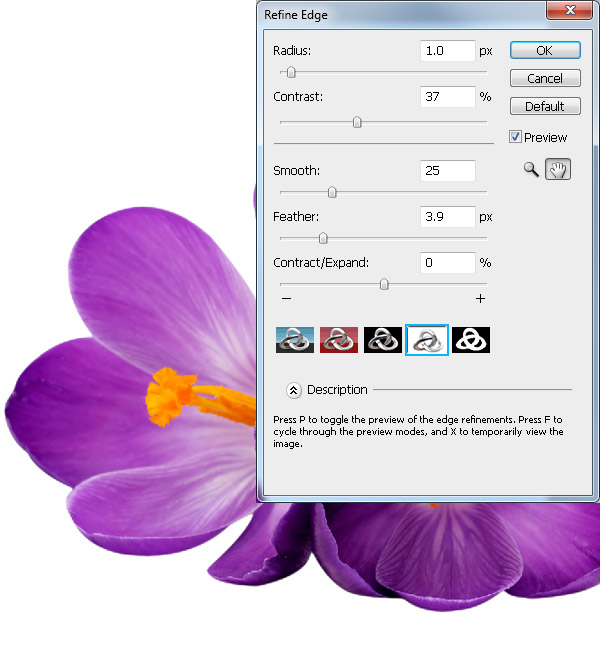
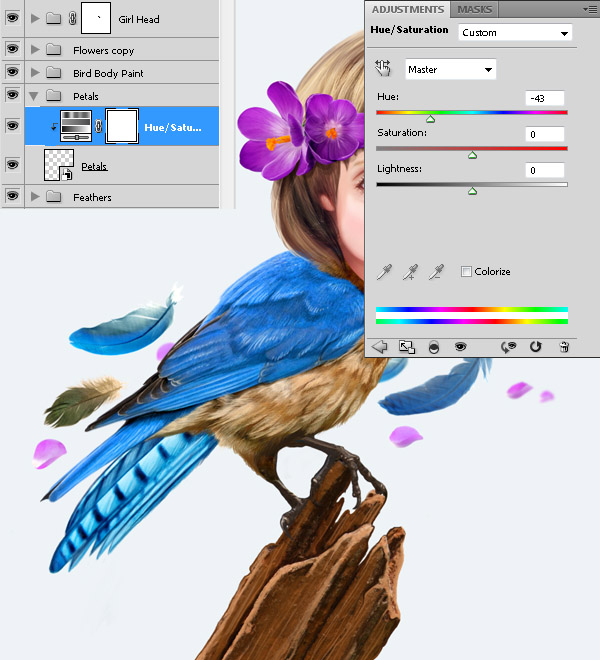
Open Flowers.jpg.Use Pen Tool (P) to select two flowers. Press Cmd/Ctrl + Enter to convert the path into a selection. Press W, then press Refine Edge and use the values as shown below. Then press Cmd/Ctrl + Shift + J (Layer via Cut), and convert the new layer to Smart Object.

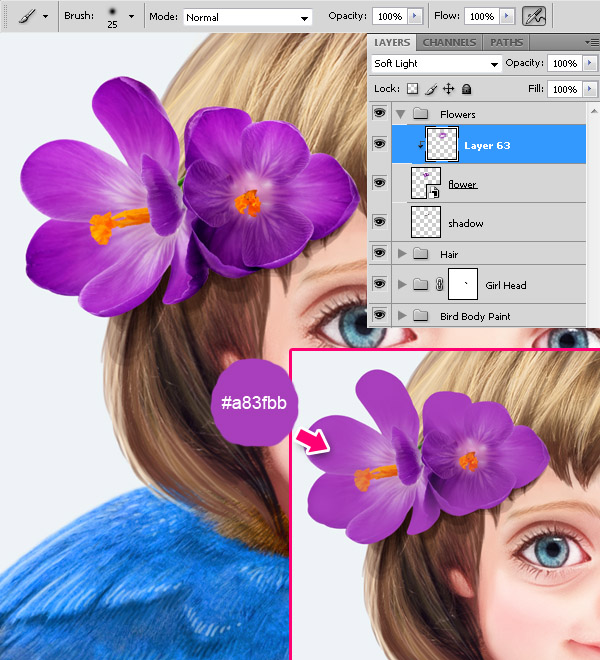
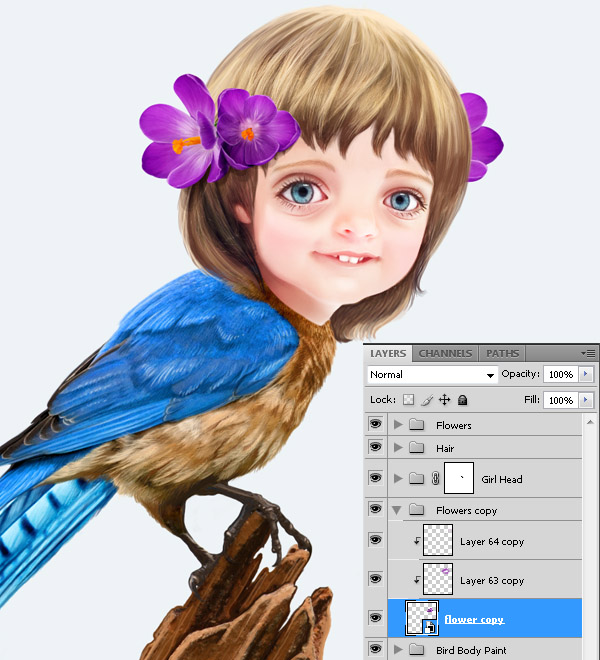
Step 19
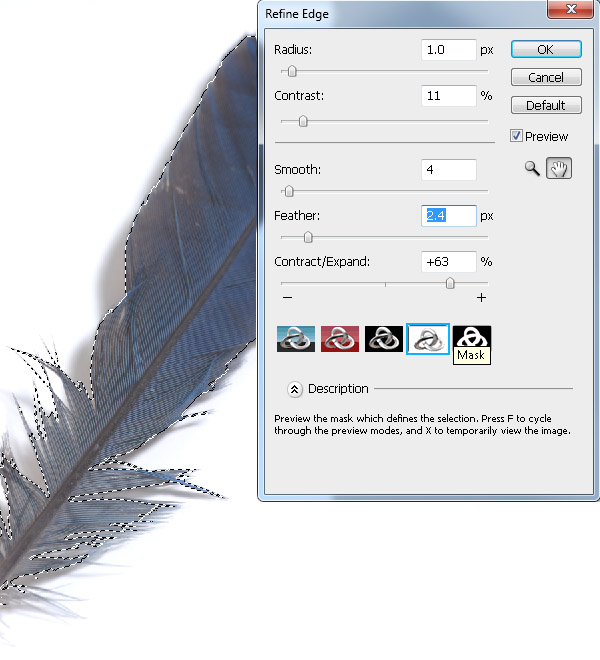
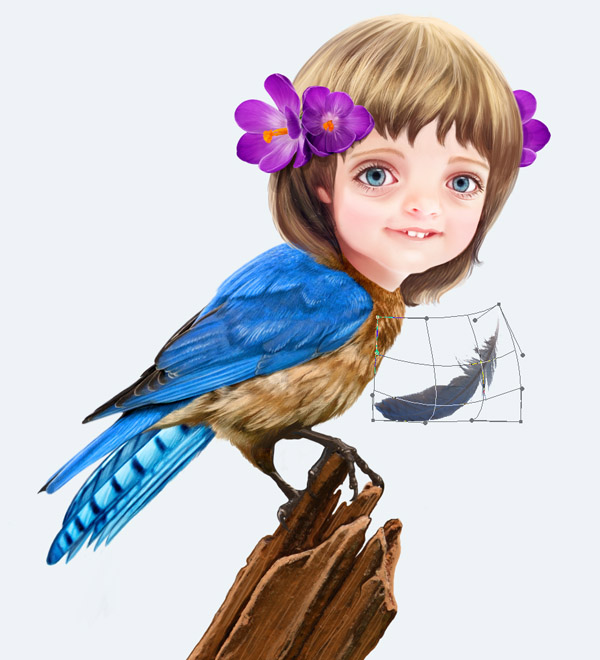
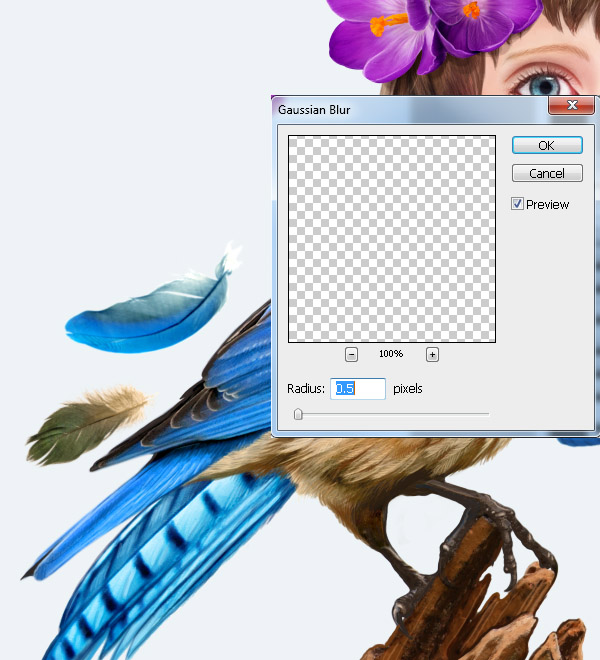
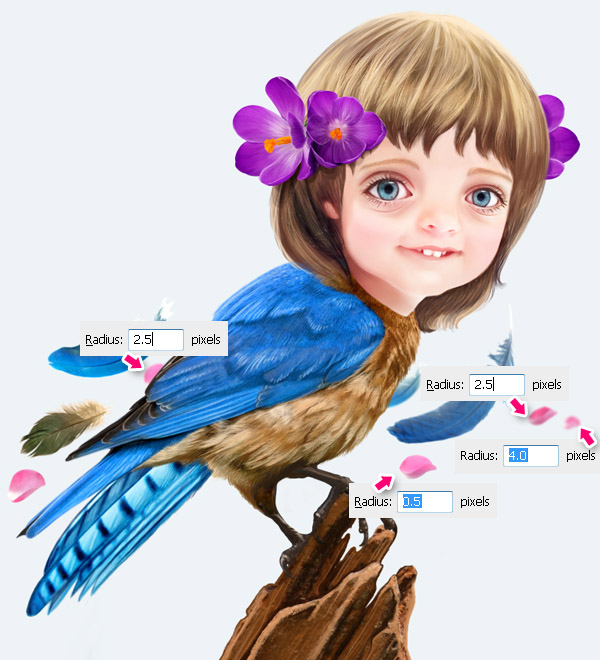
Open Feather1.jpg.Use Magic Wand Tool (W) to select white background around the feather. Then press Cmd/Ctrl + Shift + I to inverse your selection.
Press Refine Edge and change the values with the ones indicated below. Then press Cmd/Ctrl + Shift + J (Layer via Cut) to cut the selected feather to the new layer and convert it to Smart Object.

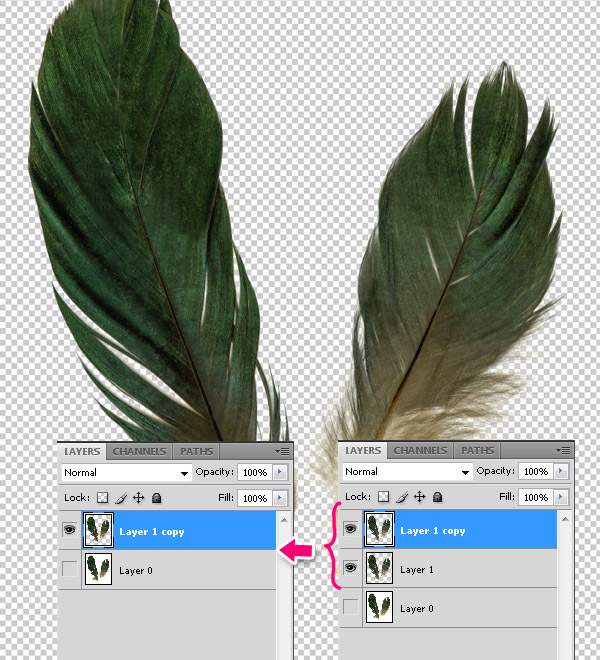
Step 20
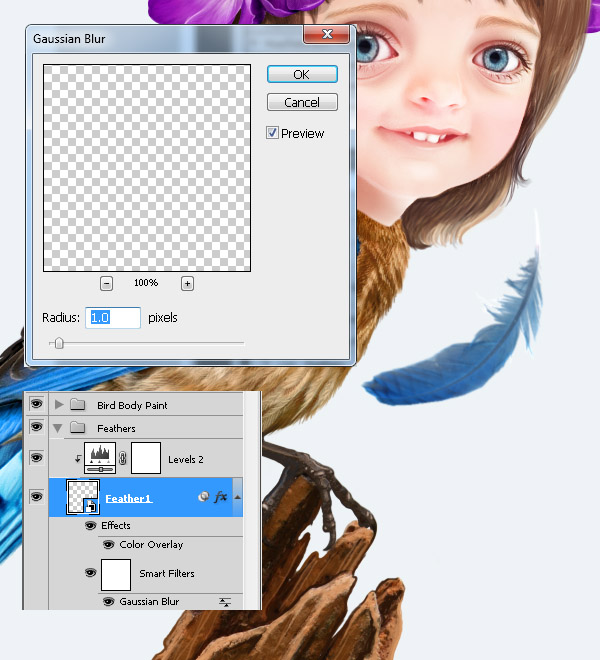
Bring the second feather (Feather2.jpg) in the same way we did the first one. Warp it and apply the same effects: select the "Feather1" layer, right-click and choose Copy Layer Style, then select the "Feater2" layer, right-click and choose Paste Layer Style. Now Select the Levels adjustment layer above "Feather1", hold Alt and drug it above "Feather2", you will see black and white arrows cursor, which means you duplicate the layer.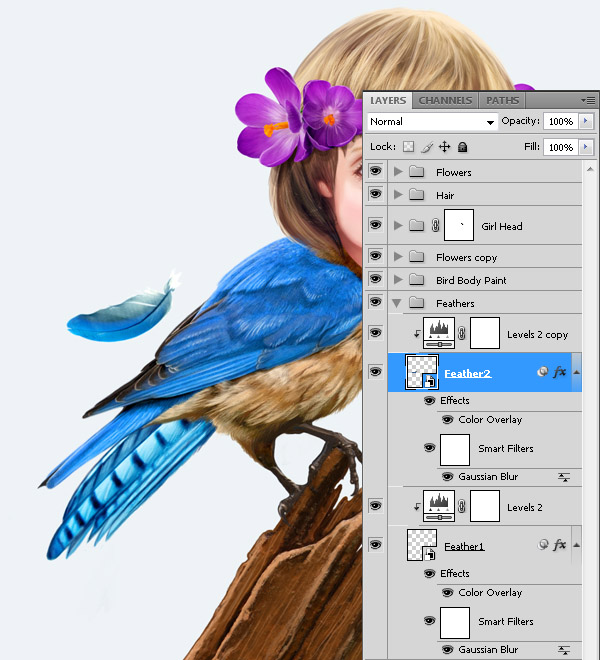
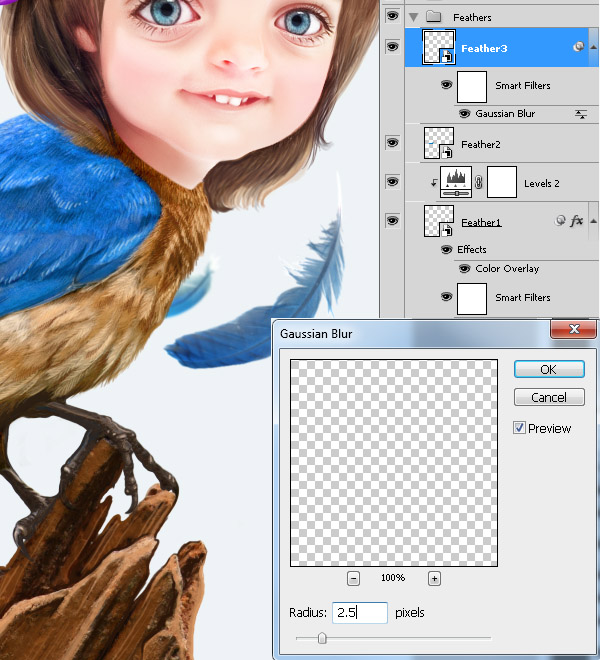
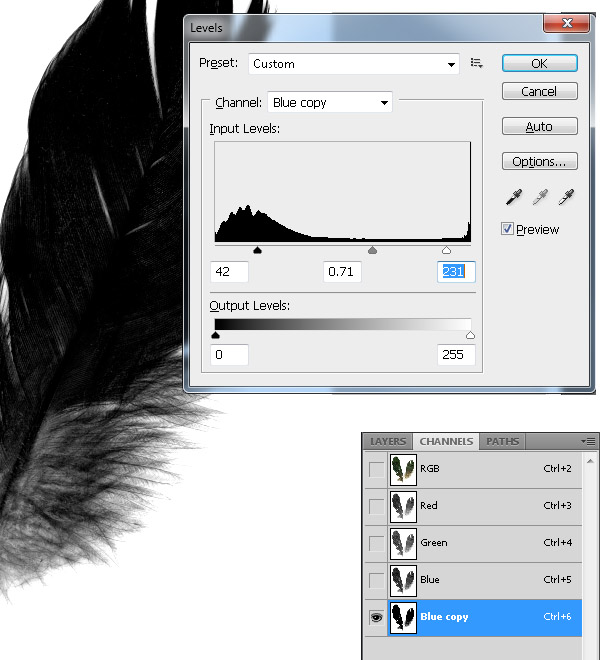
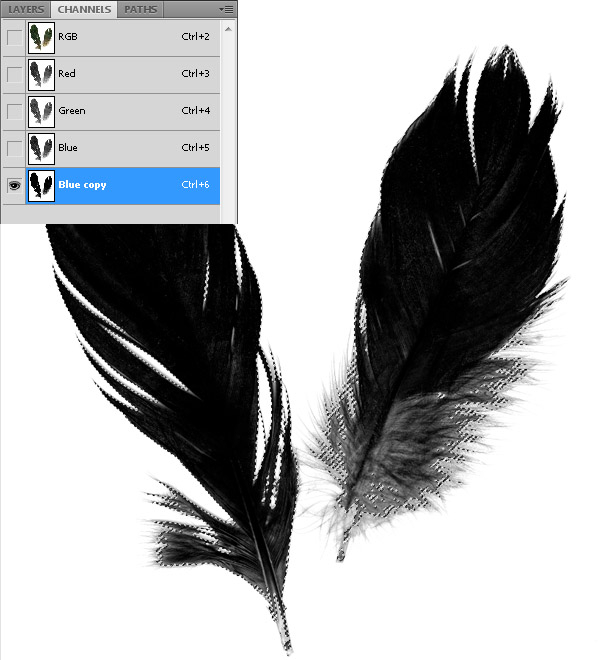
Step 21
Open Feather3.jpg. We want to cut the smaller feather, it’s very fluffy, so we will use the channels to separate it from the background.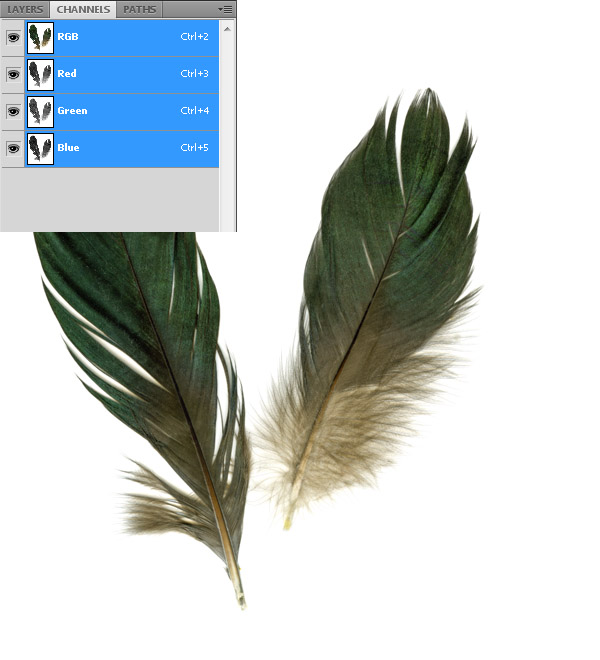

Step 22
Place the feather and add Levels.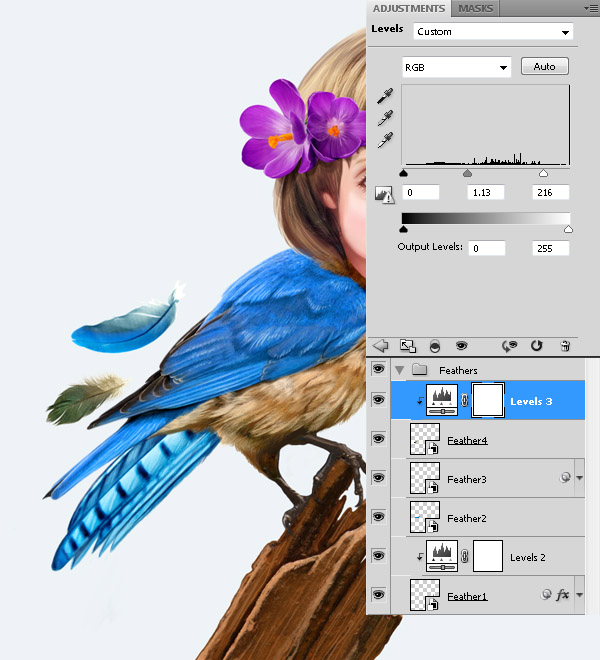
Step 23
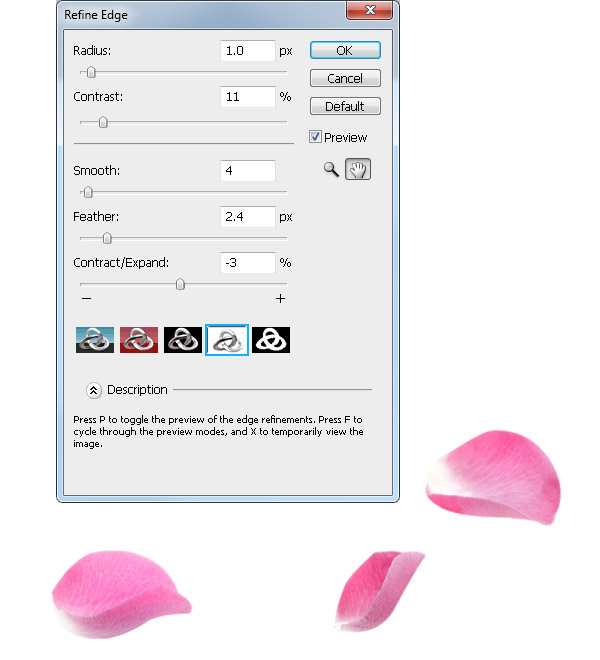
The last thing we will add is some nice rose petals. Use the Pen Tool (P) to select 3 petals, press Cmd/Ctrl + Enter to convert the path into a selection.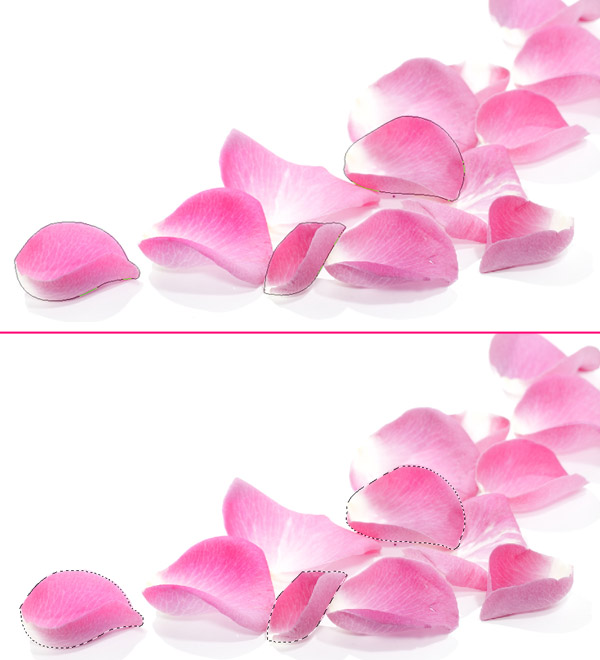
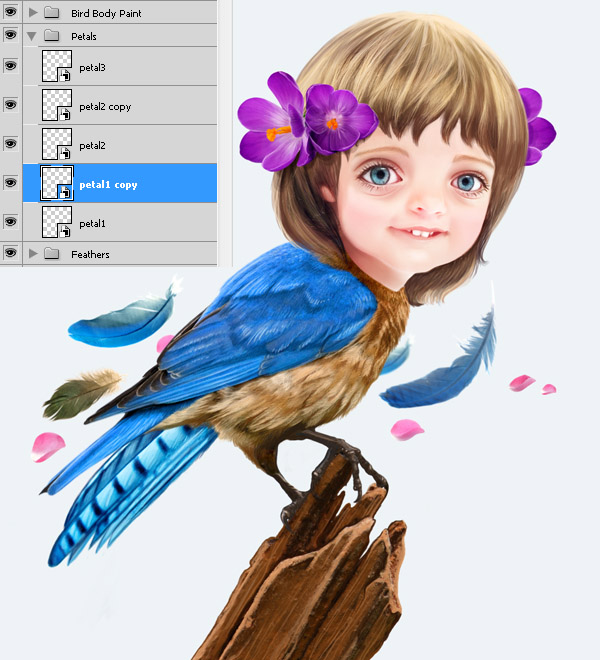
Step 24
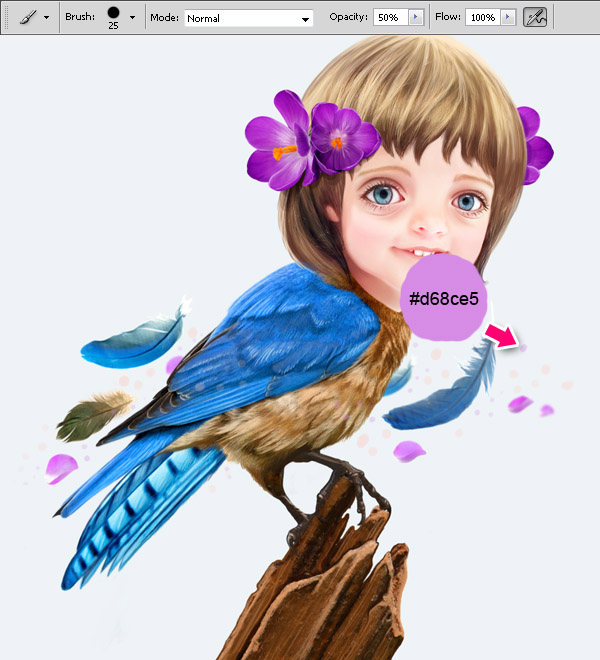
We are almost done, lets add some final touches. Paint some light pink and purple dots around the bird.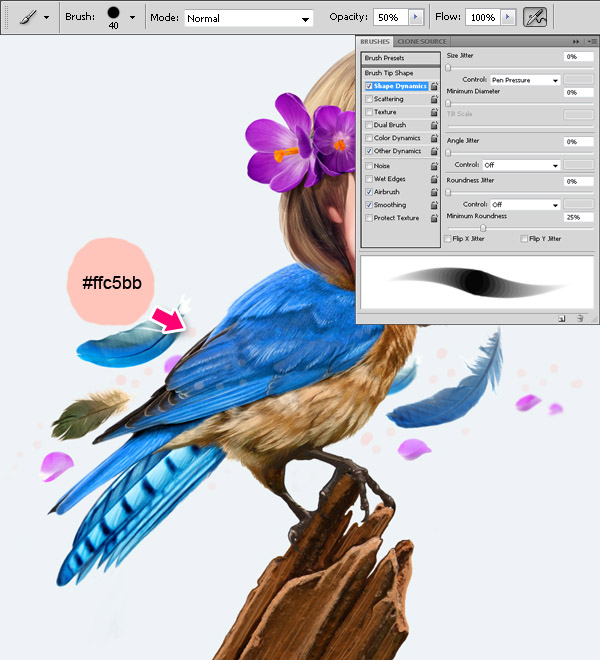
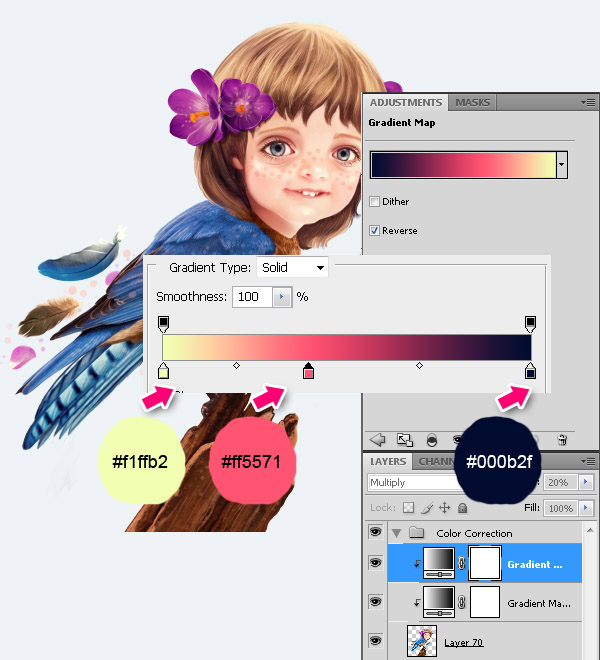
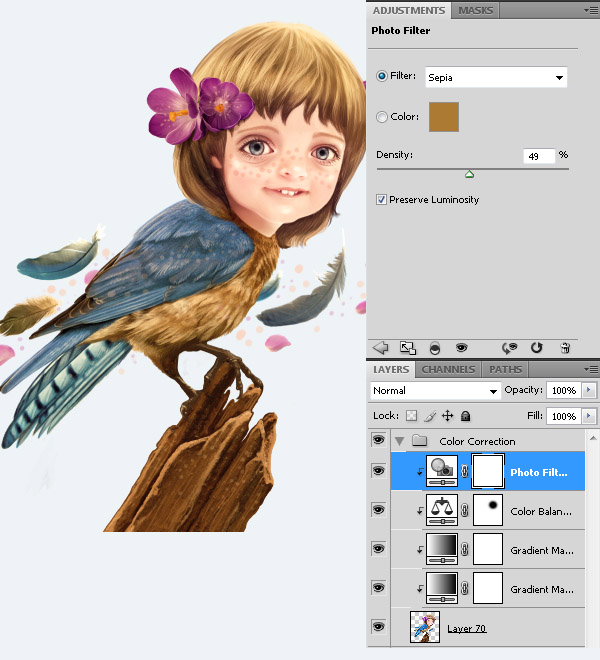
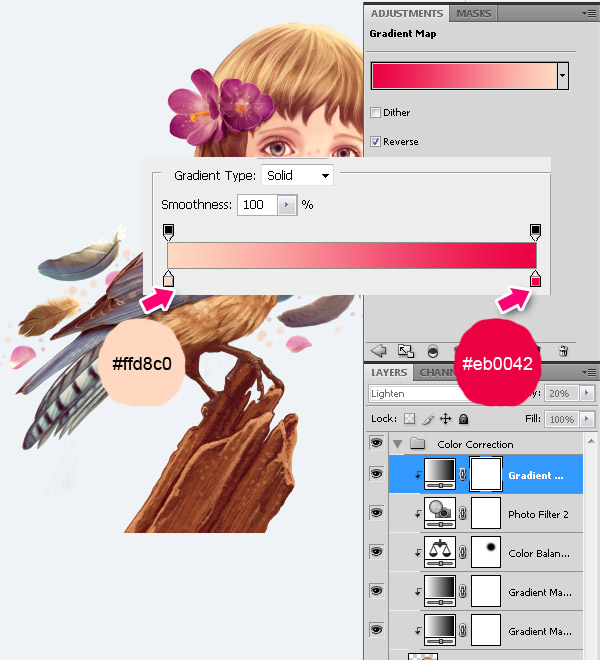
Step 25
Last step! Color correction – my favorite part of any project. Merge all layers except background and add adjustment layers as shown below. Add a Gradient Map layer with gradient colors: #ffcdb2 / #fdc084 / #6f022b. Set the layer mode to Color and opacity to 20%.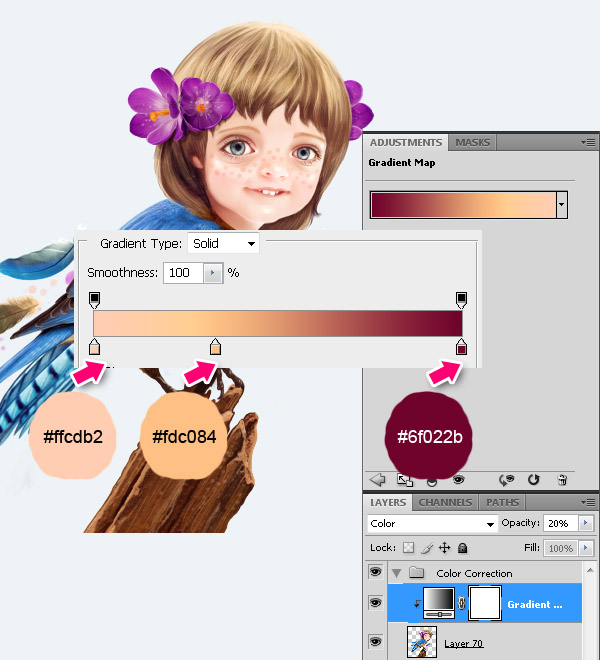

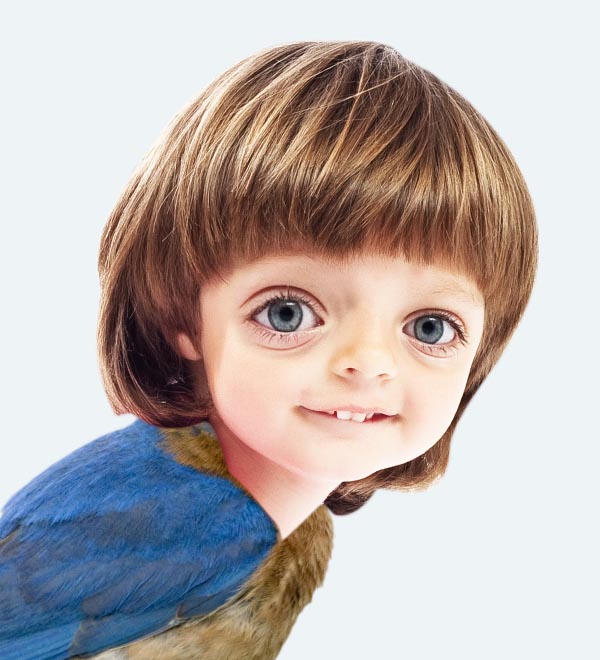
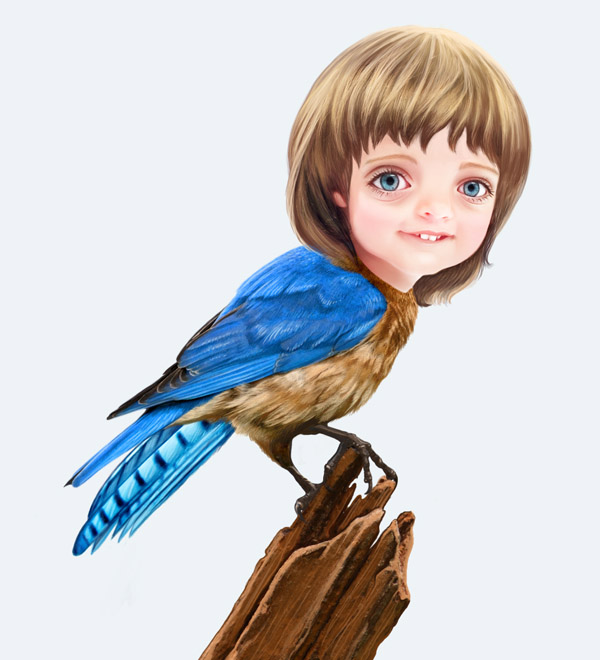
Final Image
You might now believe it but we are done! You can play more with adjustment layers to get different shades. I love this kind a vintage look we got here. I hope you liked the tutorial and the GirlBird that we created..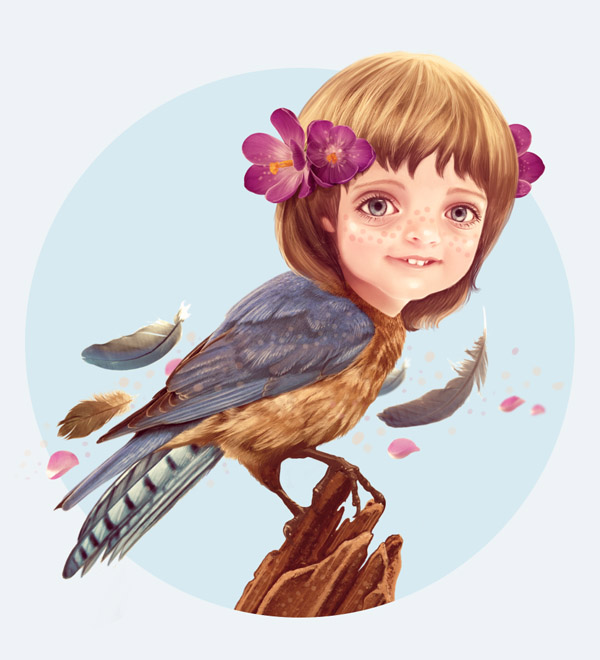

Tidak ada komentar:
Posting Komentar